Demo Các hướng dẫn thủ thuât trên Blogsopt

Articles by "Material Design"
Add-on Wordpress Plugin Adsense Backlinks Best Blogger Template Blog And Magazine Wordpress Themes Blogger Gadgets Blogger Plugins Blogger SEO Blogger SEO Tips Blogger Templates Blogger Tricks Blogger Tutorials Blogger Widgets Blogging Blogspot Series BlueHost Business City CodeCanyon Computer Corporate Wordpress Theme Creative Creative Market Creative Wordpress Theme CSS Cuisines Destination Directory & Listings Domain eCommerce WordPress Plugin eCommerce Wordpress Theme Extensions Pack Facebook Fashion FontAwesome Foods Gallery Google Google AdSense Google Webmaster Tools Hack Host Hosting HTML Hướng dẫn JavaScript Magazine Blogger Template Make Money Online Marketing Material Design Membership Miscellaneous MultiMedia Blogger Templates Multipurpose Blogger Template Music MySQL News News Blogger Template People Phần mềm Phones Photography PHP Portfolio Premium Blogger Templates Productivity Responsive Blogger Template Rss Subscribe Widget SEO SEO Optimized Blogspot Templates SEO Tips SEO Wordpress SEO Wordpress Tips Server Social Media Share Button Social Subscription Widget Software Soliloquywp Speaker Tablets Tài liệu Tech Technology Template Blogspot TheEventsCalendar Thủ Thuật Thủ Thuật Blogger Thủ Thuật Máy Tính Tin tức Tool Travel Trends Utilities WordPress Plugin Video Wedding Widgets WooCommerce Wordpress Plugin Wordpress Seo Wordpress ThemeForest Themes Wordpress Themes Wordpress Tricks Wordpress Tutorials World News WP Plugins WP Sliders Yahoo Youtube

How To Add Material Design Contact Form In Blogger
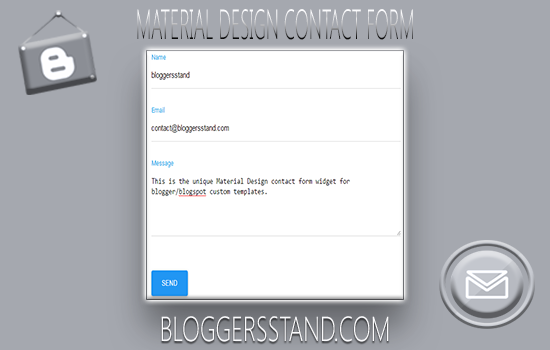
Today we are going to share an amazing new technology for blogger templates.How to add material design contact from in blogger custom templates. You all Must be knowing about material design and beautiful effects like ripple animation effect of the design. In this contact form trick we have used pure material design and the best part of this is it's without the java script. Currently lot's of web designer's are busy in learning material design and we have worked hard and developed this widget for our precious users.
Excited to add this contact form in your website ? To Grab this blogger trick just follow the below installation steps and you will be owning this beautiful widget in few mints.Let's do this.

How to create material design contact form in blogger

Installation Steps:

Step #1. Go to your blogger account > click on pages > Add new page.
Step #2. Change the view mode to HTML mode and copy the below code and paste it inside the page.
<style scoped="scoped">
.BsdCntct{float:none;position:relative;margin-bottom:44px;margin-right:9px}.BsdCntct input,.BsdCntct textarea{font-size:14px;padding:14px 0;display:block;width:100%;border:none;border-bottom:1px solid #ddd}.BsdCntct input:focus,.BsdCntct textarea:focus{outline:none}.BsdCntct label{color:#999;font-size:14px;font-weight:400;position:absolute;pointer-events:none;left:0;top:9px;transition:.2s ease all}.BsdCntct input:focus ~ label,.BsdCntct input:valid ~ label,.BsdCntct textarea:focus ~ label,.BsdCntct textarea:valid ~ label{top:-19px;font-size:13px;color:#00CC00}.barbsd{position:relative;display:block;width:100%}.barbsd:before,.barbsd:after{content:'';height:1px;width:0;bottom:1px;position:absolute;background:#00CC00;transition:.2s ease all}.barbsd:before{left:50%}.barbsd:after{right:50%}.BsdCntct input:focus ~ .barbsd:before,.BsdCntct input:focus ~ .barbsd:after,.BsdCntct textarea:focus ~ .barbsd:before,.BsdCntct textarea:focus ~ .barbsd:after{width:50%}.lightbsd{position:absolute;height:50%;width:100px;top:25%;left:0;pointer-events:none;opacity:.5}.BsdCntct input:focus ~ .lightbsd,.BsdCntct textarea:focus ~ .lightbsd{animation:inputHighlighter .3s ease}.BsdCntct input:focus ~ label,.BsdCntct input:valid ~ label,.BsdCntct textarea:focus ~ label,.BsdCntct textarea:valid ~ label{top:-19px;font-size:12px;color:#00CC00}
input#ContactForm1_contact-form-email-message{height:150px}
input#ContactForm1_contact-form-submit{color:#fff!important;background:#00CC00;padding:14px 25px;border-radius:4px;border:none;outline:none;box-shadow:0 2px 5px 0 rgba(0,0,0,0.16),0 2px 10px 0 rgba(0,0,0,0.12);cursor:pointer;transition:all .4s ease-in-out;text-transform:uppercase;float:left;margin-top:14px}
input#ContactForm1_contact-form-submit:hover{box-shadow:0 8px 17px 0 rgba(0,0,0,0.2),0 6px 20px 0 rgba(0,0,0,0.19)}
#ContactForm1_contact-form-error-message{float:right;background:#008E00;color:#fff;font-size:13px;font-weight:700;border-radius:3px}#ContactForm1_contact-form-success-message{float:right;background:#357A37;color:#fff;font-size:12px;font-weight:700;border-radius:3px}
</style>
<form name="contact-form">
<div class="BsdCntct">
<input class="validate" id="ContactForm1_contact-form-name" name="name" required="" type="text" value="" />
<span class="lightbsd"></span>
<span class="barbsd"></span>
<label>Name</label>
</div>
<div class="BsdCntct">
<input class="validate" id="ContactForm1_contact-form-email" name="email" required="" type="email" value="" />
<span class="lightbsd"></span>
<span class="barbsd"></span>
<label>Email</label>
</div>
<div class="BsdCntct">
<textarea class="validate" cols="25" id="ContactForm1_contact-form-email-message" name="email-message" required="" rows="5"></textarea>
<span class="lightbsd"></span>
<span class="barbsd"></span>
<label>Message</label>
</div>
<input id="ContactForm1_contact-form-submit" type="button" value="Send" />
<div id="ContactForm1_contact-form-error-message">
</div>
<div id="ContactForm1_contact-form-success-message">
</div>
</form>
<script src="https://www.blogger.com/static/v1/widgets/2271878333-widgets.js" type="text/javascript"></script>
<script type="text/javascript">
//<![CDATA[
if (typeof(BLOG_attachCsiOnload) != 'undefined' && BLOG_attachCsiOnload != null) { window['blogger_templates_experiment_id'] = "templatesV1";window['blogger_blog_id'] = '8866800899420715293';BLOG_attachCsiOnload(''); }_WidgetManager._Init('//www.blogger.com/rearrange?blogID\x3d8771880403313863692','//bloggersstand.com/','8771880403313863692');
_WidgetManager._RegisterWidget('_ContactFormView', new _WidgetInfo('ContactForm1', 'footer1', null, document.getElementById('ContactForm1'), {'contactFormMessageSendingMsg': '<span style="padding:5px 10px">Sending...</span>', 'contactFormMessageSentMsg': '<span style="padding:5px 10px">Your message has been sent successfully.</span>', 'contactFormMessageNotSentMsg': '<span style="padding:5px 10px">Message could not be sent. Please try again later.</span>', 'contactFormInvalidEmailMsg': '<span style="padding:5px 10px">A valid email address is required.</span>', 'contactFormEmptyMessageMsg': '<span style="padding:5px 10px">Message field cannot be empty.</span>', 'title': 'Contact Form', 'blogId': '8866800899420715293', 'contactFormNameMsg': 'Name', 'contactFormEmailMsg': 'Email', 'contactFormMessageMsg': 'Message', 'contactFormSendMsg': 'Send', 'submitUrl': 'https://www.blogger.com/contact-form.do'}, 'displayModeFull'));
//]]>
</script>
Customization: 
  • Change 8771880403313863692 with your blog id.
  • Change bloggersstand.com with your blog/website address.
  • Change 00CC00 color value with your desired color.You can choose Hex value of color from visiting Color Wheel Picker and Color Code Generator.
Now publish your page, you are done.

How To Add Ripple Animation Material Buttons In Blogger

As we all know now that Material design has become a trend as a web interface or you can say UI (user interface). It's style is popular in both variations of webpage i.e Mobile device or desktop web page. Material design has a very good appearance and attractive features. If you are using Material design UI then i'm sure your it has enhanced your blog or website.

DEMO

Today we are going to share Demo and Download Buttons Of Material Design with Ripple animation effects.Ripple animations effects means when we press the button waves effect comes out which is the one of the features of Material design.Follow the below Instructions to get these buttons on your blog or website.

How To Create Ripple Effect Demo and Download Buttons in Blogger


Installation Steps:

Step #1. Go to your blogger account and click on template then edit template then template editor.

Step #2. Copy the below CSS code and Paste it just above/before of ]]></b:skin>or</style>
/* Bloggersstand Material Design Ripple Effect Buttons */
#btnripplebsd{margin:19px auto;text-align:center}
#btnripplebsd a{text-decoration:none}
.bsdripplebtn{cursor:pointer!important;overflow:hidden;text-decoration:none;display:inline-block;-webkit-appearance:none;font-size:1.6em;border-radius:4px;color:rgba(255,255,255,0.7);font-weight:400;padding:19px 24px;margin:0 14px;box-shadow:0 2px 2px 1px rgba(0,0,0,0.1);transition:all 0.3s}
.bsdripplebtn:hover,.bsdripplebtn:active{box-shadow:0 14px 28px rgba(0,0,0,0.25),0 10px 10px rgba(0,0,0,0.22)}
.bsdripplebtn.btnone{background:#33ccff}
.bsdripplebtn.btntwo{background:#ff3333}
.bsdripplebtn.btnone:hover,.bsdripplebtn.btnone:active{background:#4dd2ff}
.bsdripplebtn.btntwo:hover,.bsdripplebtn.btntwo:active{background:#ff4d4d}
svg{position:absolute;top:0;left:0;width:100%;height:100%}
circle{fill:rgba(255,255,255,0.06)}
.ripple-effect-bsd{position:relative;overflow:hidden;-webkit-transform:translatez(0)}
.bsdeffect{display:block;position:absolute;pointer-events:none;border-radius:50%;transform:scale(0);background:#fff;opacity:0.4}
.bsdeffect.animate{animation:ripple-effect-bsd 0.4s linear}
@keyframes ripple-effect-bsd{100%{opacity:0;transform:scale(2.4)}}
@-webkit-keyframes ripple-effect-bsd{100%{opacity:0;transform:scale(2.4)}}
Step #3. Now Copy the below jquery code and paste it just before </body>
<script type='text/javascript'>
//<![CDATA[
!function(a){a(".ripple-effect-bsd").click(function(b){var c=a(this);0===c.find(".bsdeffect").length&&c.append("<span class='bsdeffect'></span>");var d=c.find(".bsdeffect");if(d.removeClass("animate"),!d.height()&&!d.width()){var e=Math.max(c.outerWidth(),c.outerHeight());d.css({height:e,width:e})}var f=b.pageX-c.offset().left-d.width()/2,g=b.pageY-c.offset().top-d.height()/2;d.css({top:g+"px",left:f+"px"}).addClass("animate")})}(jQuery);
//]]>
</script>
Adding jquery will bring the Ripple animation effects on the button.

Now Save the template.

How to Add The Material Design Ripple Animation Buttons in Template 

To add the button in the post , just copy the below HTML code and paste it anywhere in your post.
<div id="btnripplebsd">
  <a class="bsdripplebtn btnone ripple-effect-bsd" href="#" rel="nofollow" target="_blank">DEMO</a>
  <a class="bsdripplebtn btntwo ripple-effect-bsd" href="#" rel="nofollow" target="_blank">DOWNLOAD</a>
</div>
Replace The Highlighted # with your link.
You Are Done! 

How To Create make Material Design Color Boxes
How to create Material design color boxes-In this article we will explain you how to beautify your blog or website with beautiful material design color box for custom blogger templates.In previous article we already published How to Create Stylish CSS Note Box and CSS Notification Boxes using shortcode.Now days every blogger try to make their post more beautiful and unique and this is the best way to add colored design boxes between your post to highlight some important notice, quotes, headlines etc.

Why You should use Color box

One of the main reason is you must use color box in your long article is to make the reader does not get bored with writing from top to bottom without any note, quotes etc does not make look beautiful your article.So in order to keep engage your visitors with your content you must create unique design and must use material design color boxes in order to get readers attention. Interested to make it? please follow the tutorial below.

Installation Steps:

#1. Go to Blogger > Template > Edit Html
#2. Copy the below CSS and paste it just before the ]]></b:skin> or </style>
/* Material Design Color Boxes by bloggersstand.com*/
.bsdcolorboxes{overflow:hidden;position:relative;margin:.6rem 0 1rem;transition:box-shadow .26s;border-radius:3px;color:#fff;box-shadow:0 3px 6px 0 rgba(0,0,0,0.16),0 3px 10px 0 rgba(0,0,0,0.12);padding:21px;font-size:15px}
.bsdcolorboxes.blue{background:#449d48}
.bsdcolorboxes.green{background:#4CAF50}
.bsdcolorboxes.red{background:#f5554a}
.bsdcolorboxes.orange{background:#ffa219}
.bsdcolorboxes.purple{background:#7446c4}
#3. Now save your template.

Finally we are going to add the material design color boxes into the article.For that just change the mode compose to html and copy the any color code of your choice.

#1. Material Design Color Box Purple-
Material Design Color Box Purple for blogger template
<div class="bsdcolorboxes purple">
Material design color box purple.
</div>
#2. Material Design Color Box Red-
Material Design Color Box red for blogger template
 <div class="bsdcolorboxes red">
Material design color box red.
</div>
#3. Material Design Color Box Orange-
Material Design Color Box orange for blogger template
 <div class="bsdcolorboxes orange">
Material design color box orange.
</div>
#4. Material Design Color Box Blue-
Material Design Color Box blue for blogger template
<div class="bsdcolorboxes blue">
Material design color box blue.
</div>
#5. Material Design Color Box Green-
Material Design Color Box green for blogger template
<div class="bsdcolorboxes green">
Material design color box green.
</div>
Save and Publish. 

How To Add Material Design Fonts Icon In Blogger template
Do you know what is Material Icons? How to install them in your website or blog? If you don't know no need to worry at all today we are going to share How to add material web fonts icon in your blogger template.First of all let me give you an overview of material icons - how to install them , how to get material fonts icon , how to integrate in your website or in projects.

What are Material Icons?

Material icons are designed beautifully and very simple to use in your website,iOS and Android Projects.Material design icons are web friendly and ensure readability and clarity at large and small sizes, material design icons are optimized for lovely display on all the display resolutions.The icons are to be had in several codecs and are suitable for one of a kind styles of projects and structures, for builders of their apps, and for designers.

Material design icons comes under Creative Common Attribution 4.0 International License (CC-BY 4.0).You can feel free to use, share, re-share , download but you cannot sell theme. The Complete Material web fonts icons set available  to download on Material icon library and icons comes in SVG and PNGs format that are suitable for website , Android , iOS.

Material Icons Now In Blogger

Before we all are using Font awesome icons now we have option which we want to use. Google released Material Fonts icons to increase the readability and clarity at large and small scale sizes and these icons best optimized for beautiful display on all the screen resolutions.Now you can Design and replace all the font awesome icons with google material fonts icons.There are many material designs fonts icons are available but unfortunately currently all of them are not available to use in blogger, we believe soon all of them will be available.So we think at least give a worthy try to material design icons.Below are the example of material  designs web fonts icons: 

How to Install Material Web Fonts Icons In Blogger Template

Installation Steps:
Step 1. Log in to your Blogger account and Go to your Blogger Dashboard.
Step 2. Now Click on -> Template -> Edit HTML.
Step 3. Now Search for ]]></b:skin> or </style> by Pressing Ctrl+F keys.
Step 4. Copy the below CSS code and paste it just before the ]]></b:skin> or </style> tag.
@font-face {
  font-family: 'Material Icons';
  font-style: normal;
  font-weight: 400;
  src: local('Material Icons'), local('MaterialIcons-Regular'), url(https://fonts.gstatic.com/s/materialicons/v12/2fcrYFNaTjcS6g4U3t-Y5ewrjPiaoEww8AihgqWRJAo.woff) format('woff'), url(https://fonts.gstatic.com/s/materialicons/v12/2fcrYFNaTjcS6g4U3t-Y5ZjZjT5FdEJ140U2DJYC3mY.woff2) format('woff2'), url(https://fonts.gstatic.com/s/materialicons/v12/2fcrYFNaTjcS6g4U3t-Y5bbKic1PW3nceB3q24YFOMg.ttf) format('truetype');
}
.material-icons {
  font-family: 'Material Icons';
  font-weight: normal;
  font-style: normal;
  font-size: inherit;
  display: inline-block;
  line-height: 1;
  text-transform: none;
  letter-spacing: normal;
  word-wrap: normal;
  white-space: nowrap;
  direction: ltr;
  vertical-align:middle;
  /* Support for all WebKit browsers. */
  -webkit-font-smoothing: antialiased;
  /* Support for Safari and Chrome. */
  text-rendering: optimizeLegibility;
  /* Support for Firefox. */
  -moz-osx-font-smoothing: grayscale;
  /* Support for IE. */
  font-feature-settings: 'liga';
}
Step 5. Now Save your Template

Step 6. Now to install icons visit Media library icons  and choose your icon from there,when you click on the icon you can see on the page below there icon HTML code will display just copy that and paste it where you want to display material design icons in your blogger template.Look below for example how the html code will look like:
<i class="material-icons">copyright</i>
 or you can also use HTML Entity code too.
<i class="material-icons">&#xE90C;</i>
Both will display Copyright icon in your website or blog.

How to customize Material design icons 

Material designs fonts icons are very simple to customize with css. The default scale is 24px , you can increase or decrease the size of fonts icons and also give them a color.Look below for  CSS rules for material design sizing.
.material-icons.md-16{font-size:16px;}
.material-icons.md-18{font-size:18px;}
.material-icons.md-24{font-size:24px;}
.material-icons.md-36{font-size:36px;}
.material-icons.md-48{font-size:48px;}
Material Design fonts icons looks best at 24px size. However if you want to display icons in different size using the above CSS rules will help you.
adding css rule to increase the material design font icons size

Coloring Material Design Icons

To set a custom color on material design icons,you must define the css rule for the specifying the desired color of your choice.
.material-icons.orange600{color:#FB8C00;}
or.material-icons.md-orange{color:orange;} 
adding color on material design icons in blogger
However we can also add the CSS style if we want more styling on the Material design font icons,later on we will discuss on more styling of material design..till then enjoy!

MKRdezign

Biểu mẫu liên hệ

Tên

Email *

Thông báo *

Được tạo bởi Blogger.
Javascript DisablePlease Enable Javascript To See All Widget