Demo Các hướng dẫn thủ thuât trên Blogsopt

Articles by "Blogger Widgets"
Add-on Wordpress Plugin Adsense Backlinks Best Blogger Template Blog And Magazine Wordpress Themes Blogger Gadgets Blogger Plugins Blogger SEO Blogger SEO Tips Blogger Templates Blogger Tricks Blogger Tutorials Blogger Widgets Blogging Blogspot Series BlueHost Business City CodeCanyon Computer Corporate Wordpress Theme Creative Creative Market Creative Wordpress Theme CSS Cuisines Destination Directory & Listings Domain eCommerce WordPress Plugin eCommerce Wordpress Theme Extensions Pack Facebook Fashion FontAwesome Foods Gallery Google Google AdSense Google Webmaster Tools Hack Host Hosting HTML Hướng dẫn JavaScript Magazine Blogger Template Make Money Online Marketing Material Design Membership Miscellaneous MultiMedia Blogger Templates Multipurpose Blogger Template Music MySQL News News Blogger Template People Phần mềm Phones Photography PHP Portfolio Premium Blogger Templates Productivity Responsive Blogger Template Rss Subscribe Widget SEO SEO Optimized Blogspot Templates SEO Tips SEO Wordpress SEO Wordpress Tips Server Social Media Share Button Social Subscription Widget Software Soliloquywp Speaker Tablets Tài liệu Tech Technology Template Blogspot TheEventsCalendar Thủ Thuật Thủ Thuật Blogger Thủ Thuật Máy Tính Tin tức Tool Travel Trends Utilities WordPress Plugin Video Wedding Widgets WooCommerce Wordpress Plugin Wordpress Seo Wordpress ThemeForest Themes Wordpress Themes Wordpress Tricks Wordpress Tutorials World News WP Plugins WP Sliders Yahoo Youtube

best Email Newsletter Subscribe Widget For Blogger
Hello guys, Today we are going to provide you a complete list of email newsletter gadgets. 50 + email subscription newsletter widget with social media sharing icons.You can easily create newsletter for your visitors.Email subscription widget is very important for every blog.It's also maintain your readers all time and keep them updated by e-mail newsletter. It's also enable you to get excessive quantity of visitors and increase your website/blog ranking in Alexa. You can use these widgets in your website footer section, Sidebar and also on main content area. 

This is also called RSS email Subscriber tool for blogger templates. RSS email newsletter widget works with all type of blogger/blogspot custom themes. By Adding Rss email subscription plugin you can keep a track of your visitors who has subscribed your website. Below are the list of email newsletter plugins for blogspot templates.

50+ Rss email subscription newsletter widget for blogger


[dailymotion src="x2lhjki"][/dailymotion] or simply [dailymotion src="x2lhjki" /]

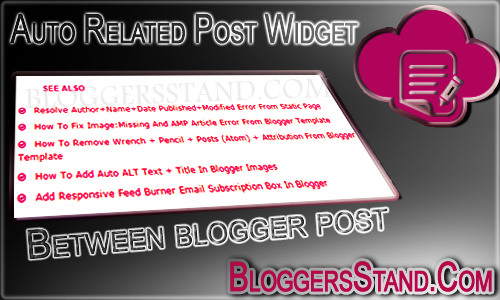
How To Add Auto Related Post Widget In Blogger Post
Hello Folks,Today in this article we are going to explain How to Add Auto related post links widget in blogger between post. However you guys are already using related post widget stick at same place.This blogger related post gadget plugin is different.When you add this tool you can see in every post related post widget display at random place means place is not fixed it will appear anywhere inside your blogger post.It will also increase the bounce rate of your website or blog, and a very nice way to keep engaged readers with your blogger related content and latest updates. Bloggersstand.com team has developed this unique widget for you.
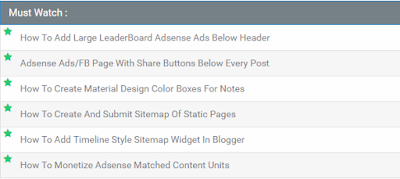
There is also one benefit you guys will get after installing this auto related post widget inside the blogger post will increase the number of page views and also it will improve the internal links in your blog. To grab this  Automatic Related Post between few lines inside blogger post widget follow the steps mentioned below.  

How to add auto related post widget in every blog post at random place

installation steps:

Style #1. 

Step .1 Go to https://www.blogger.com and Sign in to your account.
Step .2 Now From Blogger Dashboard click on ->Template ->Edit HTML.
Step .3 Now Search For ]]></b:skin> In Your Template By Using CTRL+F Keys.
Step .4 Now Paste the following below CSS just above  ]]></b:skin> tag.
/*Auto Related Post By www.Bloggersstand.com*/
.post-bloggersstand{display:block;position:relative;background:#fff;padding:0;margin:15px auto 20px;width:100%}.post-bloggersstand h4{background:#FF3300;padding:7px 10px;display:inline-block;font-size:12px;text-transform:uppercase;color:#fff;border-radius:3px;line-height:normal;border:0}.post-bloggersstand h4:before{display:none}.post-bloggersstand ul{margin:0;padding:0}.post-bloggersstand ul li{list-style:none;padding:1px 0;line-height:1.5em}.post-bloggersstand a{color:#FF3300;font-size:13px}.post-bloggersstand a:hover{color:#000;text-decoration:underline}
Step .5 Now Search for the following tag <data:post.body/> you can find this tag 2 or 3 times but will stop at 2nd and if not work  we will choose 3rd and change with the below code.
<div expr:id='&quot;post1&quot; + data:post.id'/>
<div class='post-bloggersstand'>
<b:if cond='data:post.labels'>
<b:loop values='data:post.labels' var='label'>
<b:if cond='data:blog.pageType == &quot;item&quot;'>
<script expr:src='&quot;/feeds/posts/default/-/&quot; + data:label.name + &quot;?alt=json-in-script&amp;callback=related_results_labels&amp;max-results=3&quot;' type='text/javascript'/>
</b:if>
</b:loop>
</b:if>
<h4>Must Read</h4>
<script type='text/javascript'>
removeRelatedDuplicates();
printRelatedLabels();
</script>
</div>
<div expr:id='&quot;post2&quot; + data:post.id' class='artbody' itemprop='articleBody description'><data:post.body/></div>
<script type='text/javascript'>
var obj0=document.getElementById(&quot;post1<data:post.id/>&quot;);
var obj1=document.getElementById(&quot;post2<data:post.id/>&quot;);
var s=obj1.innerHTML;
var t=s.substr(0,s.length/3);
var r=t.lastIndexOf(&quot;&lt;br&gt;&quot;);
if(r&gt;0) {obj0.innerHTML=s.substr(0,r);obj1.innerHTML=s.substr(r+4);}
</script>
Step .6 Now Look for </head> tag and copy the below code and paste it just before </head> tag.
<b:if cond='data:blog.pageType == &quot;item&quot;'>
<script type="text/javascript">
//<![CDATA[
var relatedTitles = new Array(); var relatedTitlesNum = 0; var relatedUrls = new Array(); function related_results_labels(json) { for (var i = 0; i < json.feed.entry.length; i++) { var entry = json.feed.entry[i]; relatedTitles[relatedTitlesNum] = entry.title.$t; for (var k = 0; k < entry.link.length; k++) { if (entry.link[k].rel == 'alternate') {relatedUrls[relatedTitlesNum] = entry.link[k].href; relatedTitlesNum++; break;}}}} function removeRelatedDuplicates() { var tmp = new Array(0); var tmp2 = new Array(0); for(var i = 0; i < relatedUrls.length; i++) { if(!contains(tmp, relatedUrls[i])) { tmp.length += 1; tmp[tmp.length - 1] = relatedUrls[i]; tmp2.length += 1; tmp2[tmp2.length - 1] = relatedTitles[i];}} relatedTitles = tmp2; relatedUrls = tmp;} function contains(a, e) { for(var j = 0; j < a.length; j++) if (a[j]==e) return true; return false;} function printRelatedLabels() { var r = Math.floor((relatedTitles.length - 1) * Math.random()); var i = 0; document.write('<ul>'); while (i < relatedTitles.length && i < 20) { document.write('<li><a href="' + relatedUrls[r] + '">' + relatedTitles[r] + '</a></li>'); if (r < relatedTitles.length - 1) { r++; } else { r = 0;} i++;} document.write('</ul>');}
//]]>
</script>
  </b:if>
Step .7 Now Save Your Template..Done !

Style #2.


How to add related post between inside the blogger post

Installation Steps:

Step #1. Go to blogger accountTemplate  > edit HTML
Step #2. Now Copy the below code and paste it before the </head> tag.
<b:if cond='data:blog.pageType == &quot;item&quot;'>
<script type='text/javascript'>
//<![CDATA[
var bsdrelated = new Array(); var bsdrelatedNum = 0; var relatedUrls = new Array(); function related_results_labels(json) { for (var i = 0; i < json.feed.entry.length; i++) { var entry = json.feed.entry[i]; bsdrelated[bsdrelatedNum] = entry.title.$t; for (var k = 0; k < entry.link.length; k++) { if (entry.link[k].rel == 'alternate') {relatedUrls[bsdrelatedNum] = entry.link[k].href; bsdrelatedNum++; break;}}}} function removeRelatedDuplicates() { var tmp = new Array(0); var tmp2 = new Array(0); for(var i = 0; i < relatedUrls.length; i++) { if(!contains(tmp, relatedUrls[i])) { tmp.length += 1; tmp[tmp.length - 1] = relatedUrls[i]; tmp2.length += 1; tmp2[tmp2.length - 1] = bsdrelated[i];}} bsdrelated = tmp2; relatedUrls = tmp;} function contains(a, e) { for(var j = 0; j < a.length; j++) if (a[j]==e) return true; return false;} function printRelatedLabels() { var r = Math.floor((bsdrelated.length - 1) * Math.random()); var i = 0; document.write('<ul>'); while (i < bsdrelated.length && i < 20) { document.write('<li><a href="' + relatedUrls[r] + '">' + bsdrelated[r] + '</a></li>'); if (r < bsdrelated.length - 1) { r++; } else { r = 0;} i++;} document.write('</ul>');}
//]]>
</script>
</b:if>
Step #3. Now Copy the Below Css code and paste it before ]]></b:skin> or </style>
/* Bloggersstand Auto Related Post */
.bsd-related{position:relative;padding:0;margin:15px auto;width:100%;}
.bsd-related h4{background:#768187;padding:8px 12px;margin:0;font-size:15px;font-weight:400;color:#fff;border:1px solid #2e88c5}
.bsd-related ul{margin:0;padding:0}
.bsd-related ul li{background:#f6f6f6;position:relative;list-style:none;padding:9px;margin:auto;line-height:1.4em;border:1px solid rgba(0,0,0,0.1);border-bottom:0;transition:all .3s}
.bsd-related ul li:nth-child(odd){background:#fefefe}
.bsd-related ul li:last-child{border-bottom:1px solid rgba(0,0,0,0.1)}
.bsd-related ul li:before{content:'\f005';font-family:fontawesome;position:absolute;margin:0 9px 0 4px;color:#2ecc71;overflow:hidden;transition:all .3s}
.bsd-related ul li:hover:before{content:'\f123';font-family:fontawesome;-webkit-animation:bounceright .3s alternate ease infinite;animation:bounceright .3s alternate ease infinite}
.bsd-related a{color:#768187;font-size:14px;margin:0 0 0 20px;text-transform: capitalize;}
.bsd-related a:hover{color:#0383d9;text-decoration:underline}
@-webkit-keyframes bounceright{from{-webkit-transform:translateX(0)}to{-webkit-transform:translateX(3px)}}
@keyframes bounceright{from{transform:translateX(0)}to{transform:translateX(3px)}}
Step #4. Now Find <data:post.body/> and replace it with the below code.You will find it 3 times choose your position to appear related post in page.
<div expr:id='&quot;post1&quot; + data:post.id'/>
<div class='bsd-related'>
<b:if cond='data:post.labels'>
<b:loop values='data:post.labels' var='label'>
<b:if cond='data:blog.pageType == &quot;item&quot;'>
<script expr:src='&quot;/feeds/posts/default/-/&quot; + data:label.name + &quot;?alt=json-in-script&amp;callback=related_results_labels&amp;max-results=3&quot;' type='text/javascript'/>
</b:if>
</b:loop>
</b:if>
<h4>Must Read :</h4>
<script type='text/javascript'>
removeRelatedDuplicates();
printRelatedLabels();
</script>
</div>
<div expr:id='&quot;post2&quot; + data:post.id'><p><data:post.body/></p></div>
<script type='text/javascript'>
var obj0=document.getElementById(&quot;post1<data:post.id/>&quot;);
var obj1=document.getElementById(&quot;post2<data:post.id/>&quot;);
var s=obj1.innerHTML;
var t=s.substr(0,s.length/2);
var r=t.lastIndexOf(&quot;&lt;br&gt;&quot;);
if(r&gt;0) {obj0.innerHTML=s.substr(0,r);obj1.innerHTML=s.substr(r+4);}
</script>
 Now Save your template Done.

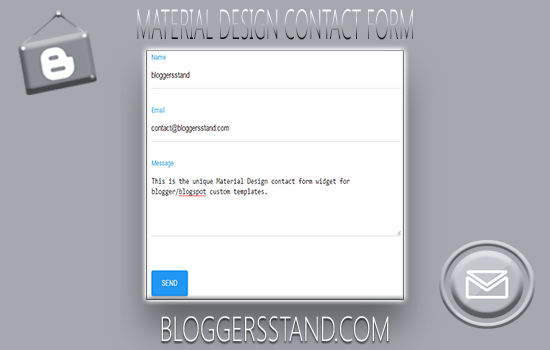
How To Add Material Design Contact Form In Blogger
Today we are going to share an amazing new technology for blogger templates.How to add material design contact from in blogger custom templates. You all Must be knowing about material design and beautiful effects like ripple animation effect of the design. In this contact form trick we have used pure material design and the best part of this is it's without the java script. Currently lot's of web designer's are busy in learning material design and we have worked hard and developed this widget for our precious users.
Excited to add this contact form in your website ? To Grab this blogger trick just follow the below installation steps and you will be owning this beautiful widget in few mints.Let's do this.

How to create material design contact form in blogger

Installation Steps:

Step #1. Go to your blogger account > click on pages > Add new page.
Step #2. Change the view mode to HTML mode and copy the below code and paste it inside the page.
<style scoped="scoped">
.BsdCntct{float:none;position:relative;margin-bottom:44px;margin-right:9px}.BsdCntct input,.BsdCntct textarea{font-size:14px;padding:14px 0;display:block;width:100%;border:none;border-bottom:1px solid #ddd}.BsdCntct input:focus,.BsdCntct textarea:focus{outline:none}.BsdCntct label{color:#999;font-size:14px;font-weight:400;position:absolute;pointer-events:none;left:0;top:9px;transition:.2s ease all}.BsdCntct input:focus ~ label,.BsdCntct input:valid ~ label,.BsdCntct textarea:focus ~ label,.BsdCntct textarea:valid ~ label{top:-19px;font-size:13px;color:#00CC00}.barbsd{position:relative;display:block;width:100%}.barbsd:before,.barbsd:after{content:'';height:1px;width:0;bottom:1px;position:absolute;background:#00CC00;transition:.2s ease all}.barbsd:before{left:50%}.barbsd:after{right:50%}.BsdCntct input:focus ~ .barbsd:before,.BsdCntct input:focus ~ .barbsd:after,.BsdCntct textarea:focus ~ .barbsd:before,.BsdCntct textarea:focus ~ .barbsd:after{width:50%}.lightbsd{position:absolute;height:50%;width:100px;top:25%;left:0;pointer-events:none;opacity:.5}.BsdCntct input:focus ~ .lightbsd,.BsdCntct textarea:focus ~ .lightbsd{animation:inputHighlighter .3s ease}.BsdCntct input:focus ~ label,.BsdCntct input:valid ~ label,.BsdCntct textarea:focus ~ label,.BsdCntct textarea:valid ~ label{top:-19px;font-size:12px;color:#00CC00}
input#ContactForm1_contact-form-email-message{height:150px}
input#ContactForm1_contact-form-submit{color:#fff!important;background:#00CC00;padding:14px 25px;border-radius:4px;border:none;outline:none;box-shadow:0 2px 5px 0 rgba(0,0,0,0.16),0 2px 10px 0 rgba(0,0,0,0.12);cursor:pointer;transition:all .4s ease-in-out;text-transform:uppercase;float:left;margin-top:14px}
input#ContactForm1_contact-form-submit:hover{box-shadow:0 8px 17px 0 rgba(0,0,0,0.2),0 6px 20px 0 rgba(0,0,0,0.19)}
#ContactForm1_contact-form-error-message{float:right;background:#008E00;color:#fff;font-size:13px;font-weight:700;border-radius:3px}#ContactForm1_contact-form-success-message{float:right;background:#357A37;color:#fff;font-size:12px;font-weight:700;border-radius:3px}
</style>
<form name="contact-form">
<div class="BsdCntct">
<input class="validate" id="ContactForm1_contact-form-name" name="name" required="" type="text" value="" />
<span class="lightbsd"></span>
<span class="barbsd"></span>
<label>Name</label>
</div>
<div class="BsdCntct">
<input class="validate" id="ContactForm1_contact-form-email" name="email" required="" type="email" value="" />
<span class="lightbsd"></span>
<span class="barbsd"></span>
<label>Email</label>
</div>
<div class="BsdCntct">
<textarea class="validate" cols="25" id="ContactForm1_contact-form-email-message" name="email-message" required="" rows="5"></textarea>
<span class="lightbsd"></span>
<span class="barbsd"></span>
<label>Message</label>
</div>
<input id="ContactForm1_contact-form-submit" type="button" value="Send" />
<div id="ContactForm1_contact-form-error-message">
</div>
<div id="ContactForm1_contact-form-success-message">
</div>
</form>
<script src="https://www.blogger.com/static/v1/widgets/2271878333-widgets.js" type="text/javascript"></script>
<script type="text/javascript">
//<![CDATA[
if (typeof(BLOG_attachCsiOnload) != 'undefined' && BLOG_attachCsiOnload != null) { window['blogger_templates_experiment_id'] = "templatesV1";window['blogger_blog_id'] = '8866800899420715293';BLOG_attachCsiOnload(''); }_WidgetManager._Init('//www.blogger.com/rearrange?blogID\x3d8771880403313863692','//bloggersstand.com/','8771880403313863692');
_WidgetManager._RegisterWidget('_ContactFormView', new _WidgetInfo('ContactForm1', 'footer1', null, document.getElementById('ContactForm1'), {'contactFormMessageSendingMsg': '<span style="padding:5px 10px">Sending...</span>', 'contactFormMessageSentMsg': '<span style="padding:5px 10px">Your message has been sent successfully.</span>', 'contactFormMessageNotSentMsg': '<span style="padding:5px 10px">Message could not be sent. Please try again later.</span>', 'contactFormInvalidEmailMsg': '<span style="padding:5px 10px">A valid email address is required.</span>', 'contactFormEmptyMessageMsg': '<span style="padding:5px 10px">Message field cannot be empty.</span>', 'title': 'Contact Form', 'blogId': '8866800899420715293', 'contactFormNameMsg': 'Name', 'contactFormEmailMsg': 'Email', 'contactFormMessageMsg': 'Message', 'contactFormSendMsg': 'Send', 'submitUrl': 'https://www.blogger.com/contact-form.do'}, 'displayModeFull'));
//]]>
</script>
Customization: 
  • Change 8771880403313863692 with your blog id.
  • Change bloggersstand.com with your blog/website address.
  • Change 00CC00 color value with your desired color.You can choose Hex value of color from visiting Color Wheel Picker and Color Code Generator.
Now publish your page, you are done.

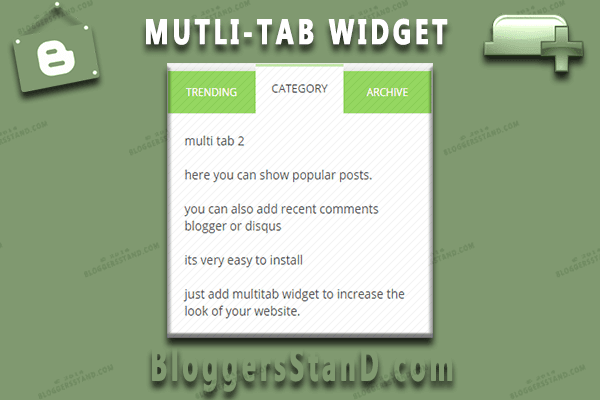
How To Install add Multi-Tab Widget gadget In Blogger Sidebar
Hello Folks, Today in this article we are going to explain How to Add Multi Tab Widget In Blogger Sidebar.Multi tab gadget tool is very useful to add in blogger template,because after installing multi tab plugin you can display popular post, features post, recent comments blogger or disqus and any content you would like to display in short precise space to your readers.We have used CSS for styling the multi tab widget and HTML.However now days blogspot custom templates comes with sidebar multi tab widget but some sidebar gadget have very simple features.Adding multi tab widget in blogger sidebar will also suits website niche.In order to grab this widget follow the steps mentioned below.
DEMO:

How to Install Multi Tab Widget In Blogger Template

Installation Steps:

Step 1. Log in to your Blogger account and Go to your Blogger Dashboard.

Step 2. Now Click on -> Template -> Edit HTML.

Step 3. Now Search for ]]></b:skin> or </style> by Pressing Ctrl+F keys or CMD+F.

Step 4. Now Copy the below CSS code and paste it just above/before </style> or ]]></b:skin>.


/* MultiTab Sidebar Widget By www.BloggersStanD.com */

.bsd-tab-area {
display: inline-block;
text-transform: uppercase;
width: 100%;
}

.bsd-tab-area p {
display: inline-block;
background: #fff;
text-transform: lowercase;
font-size: 14px;
padding: 20px;
margin: 0;
}

.bsdmultitab-gadget {
list-style: none;
margin: 0 0 10px;
padding: 0
}

.bsdmultitab-gadget li {
list-style: none;
padding: 0;
margin: 0;
float: left
}

.bsdmultitab-gadget li a {
background: #8ED557;
color: #fff;
display: block;
padding: 15px;
font-size: 12px;
text-decoration: none
}

.multitabs-bsd {
width: 33.3%;
text-align: center
}

.bsd-tab-area h2,
.bsd-tab-area h3,
.bsd-tab-area h4,
.bsd-tab-area h5,
.bsd-tab-area h6 {
display: none;
}

.bsdmultitab-gadget li a.bsdmultitab-gadget-current {
padding-bottom: 20px;
margin-top: -8px;
background: #fff;
color: #333;
text-decoration: none;
border-top: 3px solid #8ED557;
font-size: 13px;
text-transform: uppercase
}

Step 5. Now search for </body> tag and copy the below java script and paste it just above/before </body> tag.
<script type='text/javascript'>
//<![CDATA[
// Multitabs Sidebar by www.BloggersStanD.com
jQuery(document).ready(function($){ $(".bsdmultitab-gadget-content-widget-id").hide(); $("ul.bsdmultitab-gadget-content-tabs-id li:first a").addClass("bsdmultitab-gadget-current").show(); $(".bsdmultitab-gadget-content-widget-id:first").show(); $("ul.bsdmultitab-gadget-content-tabs-id li a").click(function() { $("ul.bsdmultitab-gadget-content-tabs-id li a").removeClass("bsdmultitab-gadget-current a"); $(this).addClass("bsdmultitab-gadget-current"); $(".bsdmultitab-gadget-content-widget-id").hide(); var activeTab = $(this).attr("href"); $(activeTab).fadeIn(); return false; }); });
//]]>
</script>
Step 6. Now search for  <div id='sidebar-wrapper'> and copy the below HTML code and paste it below/after <div id='sidebar-wrapper'>. If not working paste above it.
<div class='bsd-tab-area'>
<ul class='bsdmultitab-gadget bsdmultitab-gadget-content-tabs-id'>
<li class='multitabs-bsd'><a href='#multicolumn-widget-id1'>Trending</a></li>
<li class='multitabs-bsd'><a href='#multicolumn-widget-id2'>Category</a></li>
<li class='multitabs-bsd'><a href='#multicolumn-widget-id3'>Archive</a></li>
</ul>
<div class='bsdmultitab-gadget-content bsdmultitab-gadget-content-widget-id' id='multicolumn-widget-id1'>
<b:section class='sidebar' id='sidebartab1' preferred='yes'/>
</div>
<div class='bsdmultitab-gadget-content bsdmultitab-gadget-content-widget-id' id='multicolumn-widget-id2'>
<b:section class='sidebar' id='sidebartab2' preferred='yes'/>
</div>
<div class='bsdmultitab-gadget-content bsdmultitab-gadget-content-widget-id' id='multicolumn-widget-id3'>
<b:section class='sidebar' id='sidebartab3' preferred='yes'/>
</div>
</div>
Customization :
  • Change Trending, Category,Archive with your desired tabs name. 
Step 6. Now Save your Template..Done !

How To Add Responsive Recent Posts Label Widget In Blogger template
Hello Folks, Today in this article we are going to explain How to add responsive recent posts label widget in blogger template.You might have seen on so many websites or blog that on home page of website there they are displaying contents with the label widget,However now this kind of gadget comes with premium blogger template and in other blog they use simple json trick to display the recent posts with labels and those widgets are not responsive.We have tried best and presented beautiful responsive recent post plugin for blogger templates.
This widget will display five recent posts from the labels which are the most recent and rest with the button view all and in this 5 posts one with display with Big image and rest others with title of the post/article.We have used CSS for styling ,JavaScript for calling labels from feed and added HTML widget.So when you want to display the articles from different labels you need to go to layout and just change the label name from the widget and hit save button you will see new feed is live and we have added font awesome icon for the widget title,you can change the icons if you want too.So in order to install responsive recent posts widget in blogger website follow the steps mentioned below.

How to add Responsive Recent Posts With labels Widget In Blogger

Installation Steps:
Step 1. Log in to your Blogger account and Go to your Blogger Dashboard.
Step 2. Now Click on -> Template -> Edit HTML.
Step 3. Now Search for </head> by Pressing Ctrl+F keys.
Step 4. Now Copy the below code snippet and paste it just before/above </head>.

<b:if cond='data:blog.pageType != &quot;item&quot;'>
<b:if cond='data:blog.pageType != &quot;static_page&quot;'>
<style type='text/css'>
/* Responsive Recent Post Label Widget By www.Bloggersstand.com */
.bsdlabel1 ul,.bsdlabel2 ul{list-style:none;margin:0;padding:0}
.bsdlabel1 li,.bsdlabel2 li{margin:0;padding:0;}
.bsdlabel1 .widget,.bsdlabel2 .widget{margin:0;padding:0}
.bsdlabel1 .widget-content,.bsdlabel2 .widget-content{border:1px solid #e9e9e9;padding:20px;margin:0;word-wrap:break-word;overflow:hidden}
.bsdlabel1 h2,.bsdlabel2 h2,.bsdlabel3 h2{position:relative;margin:0;padding:15px 20px;font-size:16px;font-weight:700;text-transform:uppercase;color:#333;border:1px solid #e9e9e9;border-bottom:0}
.bsdlabel2 h2,.bsdlabel3 h2{margin:20px 0 0 0;}
.bsdlabel1 h2:before,.bsdlabel2 h2:before,.bsdlabel3 h2:before{content:&#39;\f1ea&#39;;right:10px;bottom:0;font-family:FontAwesome;font-style:normal;font-weight:normal;margin:0 10px 0 0;color:#ff675c;}
.bsdlabel2 h2:before{content:&#39;\f1a8&#39;;}.bsdlabel3 h2:before{content:&#39;\f143&#39;;}
.bsdlabel1 .index,.bsdlabel2 .index{font-size:10px;float:right;font-weight:400;}
.bsdlabel1 .index a,.bsdlabel2 .index a{display:flex;color:#039be5;padding:3px 8px;border-radius:2px;font-weight:400;border:1px solid #29b6f6}
.bsdlabel2 .index a{color:#ef6c00;border-color:#ffa726}
.bsdlabel1 .index a:hover{background:#039be5;color:#fff;border-color:transparent}
.bsdlabel2 .index a:hover{background:#ef6c00;color:#fff;border-color:transparent}
.bsdlabel1 .index a:after{content:&quot;\f105&quot;;font-family:FontAwesome;font-style:normal;font-weight:normal;text-decoration:inherit;padding-left:5px}
.bsdlabel2 .index a:after{content:&quot;\f105&quot;;font-family:FontAwesome;font-style:normal;font-weight:normal;text-decoration:inherit;padding-left:6px}
.bsdlabel2 span.bsd_meta_comment a:hover{color:#38761d!important}
.bsdlabel2 ul.bsd_thumbs li a:hover,.bsdlabel2 ul.bsd_thumbs2 li a:hover{color:#ff675c;text-decoration:none}
.bsd_left{width:280px;width:45.7%;float:left;margin:0;padding:0 20px 0 0;border-right:1px solid #e9e9e9}
.bsd_right{width:250px;width:47.5%;float:right;margin:0;padding:0}
ul.bsd_thumbs{margin:0;padding:0}
ul.bsd_thumbs li,ul.bsd_thumbs2{margin:0;padding:0}
ul.bsd_thumbs .cat_thumb{position:relative;margin:0 0 15px;padding:0;width:280px;height:200px}
ul.bsd_thumbs .cat_thumb img{height:auto;width:100%;transition:all 0.2s}
ul.bsd_thumbs .cat_thumb img:hover{opacity:.9;}
ul.bsd_thumbs2 li{margin:0 0 10px;padding:0 0 10px;border-bottom:1px solid #e9e9e9}
ul.bsd_thumbs2 li:last-child{border-bottom:none;margin:0;padding:0}
ul.bsd_thumbs2 .cat_thumb2{float:left;margin:0 10px 0 0;width:62px;height:72px;overflow:hidden}
ul.bsd_thumbs2 .cat_thumb2 img{height:auto;transition:all .2s}
ul.bsd_thumbs2 .cat_thumb2 img:hover{opacity:.9;}
span.bsd_title{font-family:&#39;Roboto Condensed&#39;,sans-serif;font-size:20px;font-weight:700;display:block;margin:0 0 10px;line-height:normal;text-transform:none}
span.bsd_title2{font-size:16px;line-height:1.4em;margin:0 0 3px}
span.bsd_title a{color:#333}
span.bsd_title a:hover{color:#ff675c;text-decoration:none}
span.bsd_summary{display:block;line-height:1.6em;font-size:13px;text-overflow:ellipsis;margin:10px 0 0 0}
span.bsd_meta{display:block;font-family:&#39;Roboto Condensed&#39;,sans-serif;font-size:11px;font-weight:400;color:#aaa;text-transform:uppercase}
span.bsd_meta a{color:#aaa;display:inline-block}
span.bsd_meta_date,span.bsd_meta_comment,span.bsd_meta_more{display:inline-block;margin-right:10px}
span.bsd_meta_comment a:before{content:&quot;\f0e6&quot;;font-family:FontAwesome;font-style:normal;font-weight:normal;text-decoration:inherit;padding-right:5px}
span.bsd_meta_comment a:hover{color:#ff675c!important}
span.bsd_meta_date:before{content:&quot;\f133&quot;;font-family:FontAwesome;font-style:normal;font-weight:normal;text-decoration:inherit;padding-right:5px}
ul.bsd_thumbs2 li a:hover,ul.bsd_thumbs li a:hover{color:#ff675c;text-decoration:none}
@media screen and undefinedmax-width:1024px) {
.bsdlabel1 .widget-content, .bsdlabel2 .widget-content {padding:20px 25px;}
.bsd_left {width:50%;float:left;margin:0;padding:0;border-right:none}
.bsd_right {width:46%;float:right;margin:0;padding:0;}
ul.bsd_thumbs .cat_thumb {width:100%;height:auto;}
ul.bsd_thumbs .cat_thumb img {width:100%;height:auto;}
ul.bsd_thumbs li {margin:0;padding:0;}
span.bsd_title2 {font-size:20px;line-height:1.2em;}
span.bsd_summary {font-size:14px;}}
@media only screen and undefinedmax-width:768px){
.bsdlabel1 .widget-content,.bsdlabel2 .widget-content{padding:10px 20px}
.bsd_right{width:100%;float:left;margin:0;padding:0}
ul.bsd_thumbs2 li{border-bottom:0}
span.bsd_summary,.bsd_left{display:none}
span.bsd_title{margin:0 0 5px}
ul.bsd_thumbs li{margin:0 0 10px;padding:0 0 10px;border-bottom:0}
span.bsd_title2{font-size:18px;line-height:1.2em}}
@media only screen and undefinedmax-width:480px){
#bsdlabel1-wrapper,#bsdlabel2-wrapper{display:none}}
@media only screen and undefinedmax-width:320px){
.bsdlabel1 .widget-content,.bsdlabel2 .widget-content{padding:10px 20px}
.bsdlabel1 h2,.bsdlabel2 h2{padding:10px 20px 1px 20px}
.bsd_right{width:100%;float:left;margin:0;padding:0}
ul.bsd_thumbs li{margin:0 0 10px;padding:0 0 10px;}
span.bsd_title2{font-size:18px;line-height:1.2em}}
@media screen and undefinedmax-width:260px) {
.bsdlabel1 .widget-content,.bsdlabel2 .widget-content{padding:10px}
.bsdlabel1 h2,.bsdlabel2 h2{padding:10px 10px 1px 10px}
.bsd_right{width:100%;float:left;margin:0;padding:0}
ul.bsd_thumbs li{margin:0 0 10px;padding:0 0 10px;}
span.bsd_title2{font-size:18px;line-height:1.2em}}
</style>
</b:if>
</b:if>

Step 5. Now Search for </body> tag and copy the below Javascript and paste it just above/before </body> tag.

<b:if cond='data:blog.pageType != &quot;item&quot;'>
<b:if cond='data:blog.pageType != &quot;static_page&quot;'>
<script type='text/javascript'>
//<![CDATA[
function labelthumbsundefinedt){forundefinedvar e=0;e<numposts;e++){var n,r=t.feed.entry[e],m=r.title.$t;ifundefinede==t.feed.entry.length)break;forundefinedvar i=0;i<r.link.length;i++){ifundefined"replies"==r.link[i].rel&&"text/html"==r.link[i].type)var l=r.link[i].title,o=r.link[i].href;ifundefined"alternate"==r.link[i].rel){n=r.link[i].href;break}}var u;try{u=r.media$thumbnail.url,u=u.replaceundefined"/s72-c/","/w"+thumb_width+"-h"+thumb_height+"-c/")}catchundefinedh){s=r.content.$t,a=s.indexOfundefined"<img"),b=s.indexOfundefined'src="',a),c=s.indexOfundefined'"',b+5),d=s.substrundefinedb+5,c-b-5),u=-1!=a&&-1!=b&&-1!=c&&""!=d?d:no_thumb}var p=r.published.$t,w=p.substringundefined0,4),_=p.substringundefined5,7),f=p.substringundefined8,10),g=new Array;g[1]="January",g[2]="February",g[3]="March",g[4]="April",g[5]="May",g[6]="June",g[7]="July",g[8]="August",g[9]="September",g[10]="October",g[11]="November",g[12]="December",document.writeundefined'<span class="bsd_left">'),document.writeundefined'<ul class="bsd_thumbs">'),document.writeundefined"<li>"),1==showpostthumbnails&&document.writeundefined'<a href="'+n+'"><div class="cat_thumb"><span class="rollover"></span><img width="'+thumb_width+'" height="'+thumb_height+'" alt="'+m+'" src="'+u+'"/></div></a>'),document.writeundefined'<span class="bsd_title"><a href="'+n+'" target ="_top">'+m+"</a></span>");var v="";ifundefineddocument.writeundefined'<span class="bsd_meta">'),1==showpostdate&&undefinedv=v+'<span class="bsd_meta_date">'+g[parseIntundefined_)]+" "+f+", "+w+"</span>"),1==showcommentnum&&undefined"1 Comments"==l&&undefinedl="1 Comments"),"0 Comments"==l&&undefinedl="0 Comments"),showcomment='<span class="bsd_meta_comment"><a href="'+o+'">'+l+"</a></span>",v+=showcomment),1==displaymore&&undefinedv=v+'<span class="bsd_meta_more"><a href="'+n+'" class="url" target ="_top">Read More...</a></span>'),document.writeundefinedv),document.writeundefined"</span>"),document.writeundefined'<span class="bsd_summary">'),"content"in r)var y=r.content.$t;else ifundefined"summary"in r)var y=r.summary.$t;else var y="";var k=/<\S[^>]*>/g;ifundefinedy=y.replaceundefinedk,""),1==showpostsummary)ifundefinedy.length<numchars)document.writeundefined""),document.writeundefinedy),document.writeundefined"");else{document.writeundefined""),y=y.substringundefined0,numchars);var $=y.lastIndexOfundefined" ");y=y.substringundefined0,$),document.writeundefinedy+"..."),document.writeundefined"")}document.writeundefined"</span>"),document.writeundefined"</li>"),document.writeundefined"</ul>"),document.writeundefined"</span>")}document.writeundefined'<span class="bsd_right">'),document.writeundefined'<ul class="bsd_thumbs2">');forundefinedvar e=1;e<numposts2;e++){var n,r=t.feed.entry[e],m=r.title.$t;ifundefinede==t.feed.entry.length)break;forundefinedvar i=1;i<r.link.length;i++){ifundefined"replies"==r.link[i].rel&&"text/html"==r.link[i].type)var l=r.link[i].title,o=r.link[i].href;ifundefined"alternate"==r.link[i].rel){n=r.link[i].href;break}}var x;try{x=r.media$thumbnail.url.replaceundefined"/s72-c/","/w"+thumb_width2+"-h"+thumb_height2+"-c/")}catchundefinedh){s=r.content.$t,a=s.indexOfundefined"<img"),b=s.indexOfundefined'src="',a),c=s.indexOfundefined'"',b+5),d=s.substrundefinedb+5,c-b-5),x=-1!=a&&-1!=b&&-1!=c&&""!=d?d:no_thumb2}var p=r.published.$t,w=p.substringundefined0,4),_=p.substringundefined5,7),f=p.substringundefined8,10);1==showpostthumbnails2&&document.writeundefined'<a href="'+n+'"><div class="cat_thumb2"><img width="'+thumb_width2+'" height="'+thumb_height2+'" alt="'+m+'" src="'+x+'"/></div></a>'),document.writeundefined"<li>"),document.writeundefined'<span class="bsd_title bsd_title2"><a href="'+n+'" target ="_top">'+m+"</a></span>");var v="";document.writeundefined'<span class="bsd_meta bsd_meta2">'),1==showpostdate2&&undefinedv=v+'<span class="bsd_meta_date">'+g[parseIntundefined_)]+" "+f+", "+w+"</span>"),1==showcommentnum2&&undefined"1 Comment"==l&&undefinedl="1 Comments"),"0 Comment"==l&&undefinedl="0 Comments"),showcomment='<span class="bsd_meta_comment bsd_meta_comment2"><a href="'+o+'">'+l+"</a></span>",v+=showcomment),1==displaymore2&&undefinedv=v+'<span class="bsd_meta_more bsd_meta_more2"><a href="'+n+'" class="url" target ="_top">Read More...</a></span>'),document.writeundefinedv),document.writeundefined"</span>"),document.writeundefined"</li>")}document.writeundefined"</ul>"),document.writeundefined"</span>")}
//]]>
</script>
<script type='text/javascript'>
var numposts=1,numposts2=6,showpostthumbnails=!0,showpostthumbnails2=!1,displaymore=!1,displaymore2=!1,showcommentnum=!0,showcommentnum2=!1,showpostdate=!0,showpostdate2=!0,showpostsummary=!0,numchars=150,thumb_width=280,thumb_height=200,thumb_width2=62,thumb_height2=62,no_thumb=&quot;https://blogger.googleusercontent.com/img/b/R29vZ2xl/AVvXsEhOsIskkrEdtgctgXvsov-MyIX42l6UiPuAwuCwugcgi4xm4JpTzfeWniVmrcqxH8LcaAi59j-d9r-Z4PWX_5J3ScJK9daHuIvjTSav0EuJWYtZStjYXJRzTjVcCZPmKq7RYbJdSA4h7-E/s1600/bsd_thumbs.png&quot;,no_thumb2=&quot;https://blogger.googleusercontent.com/img/b/R29vZ2xl/AVvXsEgtl9X3HIBsgp0Wld7g5GazEzz0mH3dhZACUKrQyNFBgF9Kr-9eMKd_l1HiZ_g2mD3AXyyaoPrlGMqmbTj4OVxkqGf1ax_gxqTU9GhVofhSi31PHQLl6-hCm7JGJruf2aKo2yBOpYzxUeY/s1600/bsdthumbs_small.png&quot;;
</script>
</b:if>
</b:if>

Step 6. Now add the code snippet to add new widget in layout , just copy the below code and paste it just above Blog1 Widget.To find Blog1 widget just click on Jump to widget button near save template tab and select drop down you will find id of Blog1 widget.
<b:section class='main' id='main' maxwidgets='3' showaddelement='yes'><b:widget id='labelpost' locked='true' title='Recent Posts From Label' type='Blog'>
You can also add the HTML  markup like this 

<b:if cond='data:blog.url == data:blog.homepageUrl'>
<div id='bsdlabel1-wrapper'>
<b:section class='bsdlabel1' id='bsdlabel1' maxwidgets='1' showaddelement='yes'>
<b:widget id='HTML80' locked='false' title='Widgets' type='HTML'>
<b:includable id='main'>
<h2><span class='index'>&lt;a href=&#39;/search/label/<data:content/>?&amp;max-results=8&#39;&gt;View All&lt;/a&gt;</span><data:content/></h2>
<div class='widget-content'>
<script>
document.writeundefined&quot;&lt;script src=\&quot;/feeds/posts/default/-/<data:content/>?orderby=published&amp;alt=json-in-script&amp;callback=labelthumbs\&quot;&gt;&lt;\/script&gt;&quot;);
</script>
</div>
</b:includable>
</b:widget>
</b:section>
</div>
<div id='bsdlabel2-wrapper'>
<b:section class='bsdlabel2' id='bsdlabel2' maxwidgets='1' showaddelement='yes'>
<b:widget id='HTML81' locked='false' title='Blogging' type='HTML'>
<b:includable id='main'>
<h2><span class='index'>&lt;a href=&#39;/search/label/<data:content/>?&amp;max-results=8&#39;&gt;View All&lt;/a&gt;</span><data:content/></h2>
<div class='widget-content'>
<script>
document.writeundefined&quot;&lt;script src=\&quot;/feeds/posts/default/-/<data:content/>?orderby=published&amp;alt=json-in-script&amp;callback=labelthumbs\&quot;&gt;&lt;\/script&gt;&quot;);
</script>
</div>
</b:includable>
</b:widget>
</b:section>
</div>
</b:if>
Step 7. Now Save Your Template. Step

8. Now Go to your layout and search for the widget label which you have already added now just click on edit button and change your label name and hit save button. Look below for example:
how to add recent post label widget in blogger

install add stylish beautiful custom label widget in blogger template
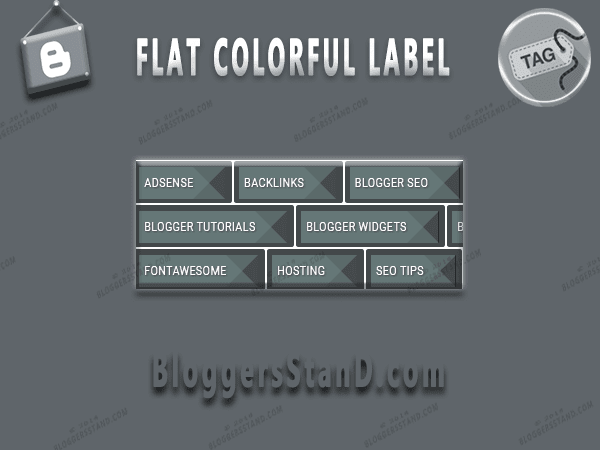
Hello Folks, Today in this article we are going to explain How to add Flat Colorful Label Widget in blogger template.You might have noticed in other websites that there tags or categories looks in different style.In this gadget we have used pure CSS for styling.However you can change the color according yourself.Blogger default cloud label widget is very simple and does not suits any blogger website niche.This widget looks like diamond shape and definitely increase the look of your blogspot blog.In order to increase page views of your website you must install categories section so the visitors can understand the topics of your website.In previous post we have shared Adding drop down function on blogger labels.So to give stylish on your labels you must install flat colorful label widget in your blogger template.To create widget follow the steps mentioned below.

How to Create Flat Cloud Colorful Label Gadget In Blogger Template

Installation Steps:
Step 1. Log in to your Blogger account and Go to your Blogger Dashboard.
Step 2. Now Click on -> Template -> Edit HTML.

Step 3. Now Search for ]]></b:skin> or </style> by Pressing Ctrl+F keys.

Step 4. Now Copy the below CSS and paste it just before/above </style> or ]]></b:skin>.


/*Flat Cloud Label Widget By www.Bloggersstand.com*/
.Label a{
padding-left: 5px;
padding-right: 31.5px;
color: #fff!important;
height: 32px;
background: #63953D;
margin-right: 2px;
line-height: 28px;
text-decoration: none;
border: none !important;
-webkit-transition: all .3s ease-in-out !important;
float: left;
margin-top: 2px;
font-size: 12px;
text-align: left; }
.Label a:hover{
color:#fff !important;
background:#8ED557; }
.Label a:after{
content: "";
position: absolute;
width: 0px;
height: 0px;
border-width: 16.5px;
border-style: solid;
border-color: rgba(0,0,0,0.1) rgba(0,0,0,0.3) rgba(0,0,0,0.1) transparent;}

Customization:
  • To Change the background color replace 63953D with your desired color.
  • To Change the Hover background color replace 8ED557 with your desired color.
  • You can choose colors from color wheel picker or color code generator.
Step 5. Now Save your Template..Done !

How To Add Demo And Download Buttons In Blogger template with fontawesome icon and css
Hello Folks,Today in this article we are going to explain you How to Add Demo and Download Button Using CSS and Font Awesome.These Demo and Download Button will Surely increase the look of your website or blog.However might be you guys are using different type of Demo and Download Buttons by using any kind of scripts or image link for display.But these Buttons are totally different it loads very fast because we have used pure CSS3 and Font awesome icons.Now Day every blog or website have font awesome feature in their website.
If you don't have fontawesome feature don't worry,you can add them anytime.To add font awesome read here:How to Add Font awesome icons in my template.Demo and download buttons come with font awesome icons and you can change the icon also if you want.So to add Buttons in your blogger template follow the steps mentioned below.
Demo
See the Pen GoPWym by BloggersStand (@bloggersstand) on CodePen.

How to add demo and download buttons with font awesome icon 

installation steps:

Step 1. Log in to your Blogger account and Go to your Blogger Dashboard.
Step 2. Now Click on -> Template -> Edit HTML.
Step 3. Now Search for ]]></b:skin> or </style> by Pressing Ctrl+F keys.
Step 4.Copy the any style code from below and paste it just before the ]]></b:skin> or </style> tag.
#Style 1
/* CSS Button Style by www.BloggersStanD.com */
.bsdbutton{float:left;list-style:none;text-align:center;width:95%;margin:10px;padding:2px;font-size:14px;clear:both}
.bsdbutton ul{margin:0;padding:0}
.bsdbutton li{display:inline;margin:5px;padding:0;list-style:none}
.bsdbutton li a.demo,.bsdbutton li a.download{position:relative;padding:9px 48px 9px 16px;background:#f39c12;color:#fff!important;font-weight:700;font-size:14px;text-align:center;text-transform:uppercase;letter-spacing:0.5px;border-radius:3px;box-shadow:0 1px rgba(0,0,0,0.1);line-height:normal;transition:all .3s}
.bsdbutton li a.download{background:#3498db}
.bsdbutton li a.demo:hover,.bsdbutton li a.download:hover{background:#666}
.bsdbutton li a.demo:active,.bsdbutton li a.download:active{cursor:pointer}
.bsdbutton li a.demo:after,.bsdbutton li a.download:after{content:'\f135';background:rgba(0,0,0,0.1);position:absolute;right:0;top:0;font-weight:normal;display:inline-block;margin:0 0 0 10px;color:#fff;padding:11px;font-family:fontawesome}
.bsdbutton li a.download:after{content:'\f019'}
#Style 2 
/* CSS Button Style by www.BloggersStand.Com */
.bsdbutton1{float:left;list-style:none;text-align:center;width:95%;margin:10px;padding:2px;font-size:14px;clear:both}
.bsdbutton1 ul{margin:0;padding:0}
.bsdbutton1 li{display:inline;margin:5px;padding:0;list-style:none}
.bsdbutton1 li a.demo,.bsdbutton1 li a.download{position:relative;padding:14px 48px 14px 16px;background:#f39c12;display:block;color:#fff!important;font-weight:700;font-size:14px;text-align:left;text-transform:uppercase;letter-spacing:.2px;border-radius:3px;box-shadow:0 1px rgba(0,0,0,0.1);line-height:normal;transition:all .3s;max-width:170px;margin:auto;overflow:hidden}
.bsdbutton1 li a.download{background:#3498db}
.bsdbutton1 li a.demo:hover,.bsdbutton1 li a.download:hover{background:#666}
.bsdbutton1 li a.demo:active,.bsdbutton1 li a.download:active{cursor:pointer}
.bsdbutton1 li a.demo:after,.bsdbutton1 li a.download:after{content:'\F054';background:rgba(0,0,0,0.1);position:absolute;right:0;top:0;font-weight:normal;display:inline-block;margin:0 0 0 10px;color:#fff;padding:16px 24px;font-family:fontawesome;transition:all .3s}
.bsdbutton1 li:hover a.demo:after,.bsdbutton1 li:hover a.download:after{background:transparent;-webkit-animation:bounceright .3s alternate ease infinite;animation:bounceright .3s alternate ease infinite}
@-webkit-keyframes bounceright{from{-webkit-transform:translateX(0)}to{-webkit-transform:translateX(3px)}}
@keyframes bounceright{from{transform:translateX(0)}to{transform:translateX(3px)}}

Customization:


Step 5. Now Search for <head> by Pressing Ctrl+F keys.
Step 6.Copy the below Font Awesome Icons script and paste it just before the <head> tag.
<link href='//netdna.bootstrapcdn.com/font-awesome/4.5.0/css/font-awesome.min.css' rel='stylesheet'/>
Step 7. Now Save your template.

How To Add Demo and Download button inside the post editor

Whenever you create a new post and you want to add these buttons just click on HTML mode tab near compose mode inside your post editor and choose your place where you want to show these button just paste the any one of style to show the buttons inside the post.
#Style 1
<div style="text-align: center;">
  <ul class="bsdbutton">
    <li><a class="demo" href="http://www.bloggersstand.com" target="_blank">Demo Link</a></li>
    <li><a class="download" href="http://bloggersstand.com" target="_blank">Download Link</a></li>
  </ul>
</div>
<div class="clear"></div>
#Style 2 
<div style="text-align: center;">
  <ul class="bsdbutton1">
    <li><a class="demo" href="http://bloggersstand.com" target="_blank">Demo Link</a></li>
    <li><a class="download" href="http://bloggersstand.com target="_blank">Download Link</a></li>
  </ul>
</div>
<div class="clear"></div>
And Publish Your Post ! 

How To Create make Material Design Color Boxes
How to create Material design color boxes-In this article we will explain you how to beautify your blog or website with beautiful material design color box for custom blogger templates.In previous article we already published How to Create Stylish CSS Note Box and CSS Notification Boxes using shortcode.Now days every blogger try to make their post more beautiful and unique and this is the best way to add colored design boxes between your post to highlight some important notice, quotes, headlines etc.

Why You should use Color box

One of the main reason is you must use color box in your long article is to make the reader does not get bored with writing from top to bottom without any note, quotes etc does not make look beautiful your article.So in order to keep engage your visitors with your content you must create unique design and must use material design color boxes in order to get readers attention. Interested to make it? please follow the tutorial below.

Installation Steps:

#1. Go to Blogger > Template > Edit Html
#2. Copy the below CSS and paste it just before the ]]></b:skin> or </style>
/* Material Design Color Boxes by bloggersstand.com*/
.bsdcolorboxes{overflow:hidden;position:relative;margin:.6rem 0 1rem;transition:box-shadow .26s;border-radius:3px;color:#fff;box-shadow:0 3px 6px 0 rgba(0,0,0,0.16),0 3px 10px 0 rgba(0,0,0,0.12);padding:21px;font-size:15px}
.bsdcolorboxes.blue{background:#449d48}
.bsdcolorboxes.green{background:#4CAF50}
.bsdcolorboxes.red{background:#f5554a}
.bsdcolorboxes.orange{background:#ffa219}
.bsdcolorboxes.purple{background:#7446c4}
#3. Now save your template.

Finally we are going to add the material design color boxes into the article.For that just change the mode compose to html and copy the any color code of your choice.

#1. Material Design Color Box Purple-
Material Design Color Box Purple for blogger template
<div class="bsdcolorboxes purple">
Material design color box purple.
</div>
#2. Material Design Color Box Red-
Material Design Color Box red for blogger template
 <div class="bsdcolorboxes red">
Material design color box red.
</div>
#3. Material Design Color Box Orange-
Material Design Color Box orange for blogger template
 <div class="bsdcolorboxes orange">
Material design color box orange.
</div>
#4. Material Design Color Box Blue-
Material Design Color Box blue for blogger template
<div class="bsdcolorboxes blue">
Material design color box blue.
</div>
#5. Material Design Color Box Green-
Material Design Color Box green for blogger template
<div class="bsdcolorboxes green">
Material design color box green.
</div>
Save and Publish. 

How To Add Timeline Style Sitemap Widget In Blogger
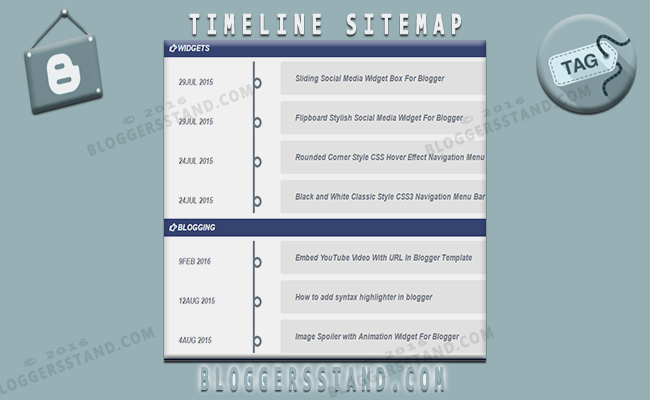
Today we are going to tell you how to install ajax based timeline sitemap widget for blogger static .page.Sitemap is a must have web page for each weblog, it may assist to enhance your weblog navigation and likewise to cut back the weblog's bounce price.The sitemap widget we will add right now exhibits an inventory of articles on the most recent revealed order underneath every classes.

How to add a timeline style sitemap widget in blogger template

Installation Steps:

Step 1. First go to Blogger Dashboard > Template > Edit HTML
Step 2. Click inside the HTML Editor, Press CTRL+F
Step 3. Now search for </head>
Step 4. Above </head> place the below code.
<style type='text/css'>
.bsd-sitemap { border-bottom: 3px solid #415471; }.bsd-toc-wrap { display: inline-block; font-family:'Roboto Condensed',Helvetica; width: 100%; }.bsd-toc-wrap .bsd-cat { background: #415471; border-radius: 3px; color: #fff; font-size: 14px; font-weight: bold; padding: 5px 10px; text-transform: uppercase; }.bsd-cat:before{font-family:FontAwesome;content:'\F0A4';color:#fff;margin:0 3px;}.bsd-toc::before { background: #768187; bottom: 0; content: &quot;&quot;; left: 20%; margin-left: -10px; position: absolute; top: 0; width: 4px; }.bsd-toc { margin: 0; padding: 30px 20px; position: relative; }.bsd-toc li { list-style: none; margin: 0; padding: 0; position: relative; }.bsd-toc &gt; li .toc-date { color: #768187; display: block; font-size: 13px; font-weight: bold; position: absolute; text-transform: uppercase; top: 25px; width: 15%; }.bsd-toc &gt; li .bsd-icon { background: #fff; border-radius: 50%; box-shadow: 0 0 0 4px #768187; color: #fff; font-size: 1.4em; font-style: normal; font-variant: normal; font-weight: normal; height: 10px; left: 20%; line-height: 10px; margin: 0 0 0 -25px; position: absolute; text-align: center; text-transform: uppercase; top: 30px; width: 10px; }.bsd-toc &gt; li .bsd-post::after { border-color: transparent #fefefe transparent transparent; border-style: solid; border-width: 10px; content: &quot; &quot;; height: 0; pointer-events: none; position: absolute; right: 100%; top: auto; width: 0; }.bsd-toc &gt; li .bsd-post { background: #eeeeee; border-radius: 4px; display: block; font-size: 14px; line-height: 14px; margin: 0 0 10px 23%; padding: 20px 30px; position: relative; }.bsd-toc &gt; li .bsd-post a { color: #768187; font-weight: bold; }.bsd-toc &gt; li .bsd-post a:hover { color: #415471; }</style> <script src='http://ajax.googleapis.com/ajax/libs/jquery/2.0.3/jquery.min.js' type='text/javascript'/>
<b:if cond='data:blog.pageType == &quot;static_page&quot;'>
<script src='https://cdn.rawgit.com/ishekharsingh/bloggersstand/master/sitemap.js' type='text/javascript'/>
</b:if>

Customization:

If you already using jquery script then remove the above highlighted script from the code. 
Step 5. Now Save your template.
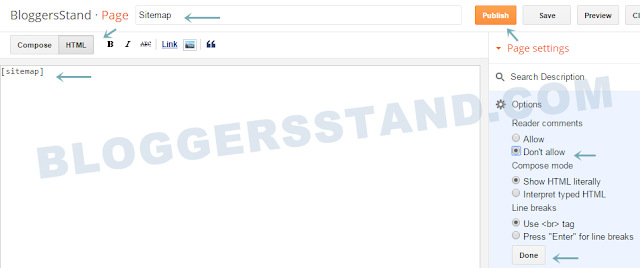
Step 6. Now Go to Pages > New page
Step 7. Now write [sitemap] in html mode.
Step 7. Look below in example for adding sitemap widget
create static sitemap in blogger

Step 9. Now Publish your page and you are done.

How To Add 4 In One Box Social Media Widget In Blogger template
Hello folks, today in this article we are going to explain How to add 4 in one boxed style social media widget in blogger template.This widget is very useful for the any website or blog.In box social media profile gadget we have added three social media Facebook , twitter and google plus and additionally we have added section for join our site plugin to follow the blogspot website.Box 4 in one social media is very light weight widget with the integration of the font awesome icons on it.We have used CSS for styling and html for the box.Box social media widget will surely going to enhance the look of any website.In order to get the 4 in one boxed social media widget follow the steps mentioned below.
DEMO

How to Install 4 in one box social media widget in blogger template

Installation Steps:

Step 1. Log in to your Blogger account and Go to your Blogger Dashboard.

Step 2. Now Click on  Template -> Edit HTML.

Step 3. Now Search for </head> tag by Pressing Ctrl+F keys.

Step 4. Copy the below Fontawesome CSS stylesheed and paste it just before the </head> tag.( If you already added fontawesome stylesheet then skip 4th step.)

<link href='//maxcdn.bootstrapcdn.com/font-awesome/4.5.0/css/font-awesome.min.css' rel='stylesheet'/>
Step 5. Now Search for ]]></b:skin> or </style> by Pressing Ctrl+F keys.
Step 6. Copy the below CSS code and paste it just before the ]]></b:skin> or </style> tag.

#HTML20
.bsdbox-info h4 {
background: transparent;
position: relative;
padding: 0;
margin: 0;
border: 0;
text-align: center;
font-size: 110%
}

.bsdbox-img {
position: relative;
max-height: 135px;
overflow: hidden
}

.bsdbox-img img {
max-width: 100%;
width: 100%;
transition: all .6s;
}

.bsdbox-img:hover img {
transform: scale(1.2) rotate(-9deg)
}

.bsdbox-img:before {
content: '';
background: rgba(0, 0, 0, 0.2);
position: absolute;
top: 0;
left: 0;
right: 0;
bottom: 0;
z-index: 2;
transition: all .3s
}

.bsdbox-img:hover:before {
background: rgba(0, 0, 0, 0.5);
}

.joinfloat-img {
width: 56%;
position: absolute;
top: 36%;
bottom: 36%;
left: 22.6%;
z-index: 4
}

.bsdbox-float {
text-align: center;
display: table;
width: 100%;
height: 100%
}

.bsdbox-float a {
background: transparent;
color: #37B185;
padding: 8px 14px;
z-index: 2;
display: table-cell;
width: 100%;
font-size: 90%;
text-transform: uppercase;
vertical-align: middle;
border: 1px solid #37B185;
border-radius: 4px;
transition: all .3s
}

.bsdbox-float:hover a {
background: #37B185;
color: #fefefe;
border-color: transparent;
}

.bsdbox-float a i {
font-weight: normal;
margin: 0 6px 0 0
}

.bsdbox-wrap {
display: block;
margin: 14px auto;
position: relative;
}

.bsdbox-wrap .bsdextend {
width: 100%;
display: block;
}

.bsdextend {
text-align: center;
font-size: 17px
}

.bsdextend .bsdbox-icon {
display: inline-block;
border: 0;
margin: 0;
padding: 0;
width: 32%;
}

.bsdextend .bsdbox-icon a {
background: #768187;
display: inline-block;
font-weight: 410;
color: #fefefe;
padding: 0 12px;
line-height: 32px;
border-radius: 4px;
font-size: 11px;
width: 100%;
}

.bsdextend .bsdbox-icon i {
font-family: fontawesome;
margin: 0 4px 0 0
}

.bsdbox-icon.facebook a {
background: #3b5998
}

.bsdbox-icon.twitter a {
background: #19bfe5
}

.bsdbox-icon.circle a {
background: #d64136
}

.bsdbox-icon.facebook a:hover,
.bsdbox-icon.twitter a:hover,
.bsdbox-icon.circle a:hover {
background: #415471
}

.bsdextend .bsdbox-icon:hover a,
.bsdextend .bsdbox-icon a:hover {
color: #fefefe;
}

.bsdbox-info {
margin: 11px 0 0 0;
font-size: 12px;
text-align: center;
}

.bsdbox-info p {
margin: 6px 0
}

.bsdbox-info h4 {
position: relative;
margin-bottom: 11px;
font-size: 15px;
text-transform: uppercase;
color: #37B185;
font-weight: 600
}

.bsdbox-info h4 span {
position: relative;
display: inline-block;
padding: 0 11px;
margin: 0 auto;
}

.bsdbox-info h4:before,
.bsdbox-info h4:after {
position: absolute;
top: 52%;
overflow: hidden;
width: 50%;
height: 1px;
content: '\a0';
background-color: rgba(0, 0, 0, 0.07);
}

.bsdbox-info h4:before {
margin-left: -50%;
text-align: right;
}

Step 7. Now copy the below HTML code and paste it between <body> - </body> tag.

<b:widget id='HTML20' locked='false' title='Join us' type='HTML' visible='true'>
<b:includable id='main'>
<!-- only display title if it's non-empty -->
<b:if cond='data:title != &quot;&quot;'>
<h2 class='title'><data:title/></h2>
</b:if>
<div class="widget-content">
<div class="author-sidebar">
<div class='inner_wrapper'>
<div class='bsdbox-img'>
<img alt='Bloggersstand' class='img-responsive' height='auto' src='https://blogger.googleusercontent.com/img/b/R29vZ2xl/AVvXsEhkXW_gXZ6XOp49aq8Ldq_WRoKqndjGpN9Cvdad3ENCSE08GY58z3OEcs6XyGTllro2Ei9DHyebrzy-YtrQBfV-yPaIocS4I6uZOQ-x9Uzy7Ef_UtUku84Z0WkW8Iah-JWN439TxasUnLE/s1600/subscribe+to+bloggersstand+feed.jpg' title='Bloggersstand' width='300' ></img>
<div class='joinfloat-img'><span class='bsdbox-float'><a href='https://www.blogger.com/follow-blog.g?blogID=8771880403313863692' rel='nofollow' target='_blank' title='Join Our Site'><i class='fa fa-laptop'></i> Join Our Site</a></span></div>
</div>
</div>
<div class='bsdbox-info'>
<h4><span>Bloggersstand.com</span></h4>
<p>Micro Blogging + SEO Tips + Make Money</p>
</div>
<div class='bsdbox-wrap'>
<ul class='bsdextend'>
<li class='bsdbox-icon facebook'>
<a href='https://www.facebook.com/bloggersstand' target='_blank' title='Follow us on Facebook'><i class='fa fa-facebook fa-fw'></i>Follow Us</a>
</li>
<li class='bsdbox-icon twitter'>
<a href='https://twitter.com/bloggersstand' target='_blank' title='Follow us on Twitter'><i class='fa fa-twitter fa-fw'></i>Follow Us</a>
</li>
<li class='bsdbox-icon circle'>
<a href='https://plus.google.com/+Bloggersstand' rel='nofollow' target='_blank' title='Follow us on Google+'><i class='fa fa-google-plus fa-fw'></i>Circle Us</a>
</li>
</ul>
</div>
</div>
</div>
</b:includable>
</b:widget>

Customization:
Remove social media profile name bloggersstand with your username.
To change inside title of the widget, please replace bloggersstand.com with your title.
To change the description or text inside the widget, replace blogging + ...</p> with your text.
To change the background image of the box style widget ,replace the image url.

Step 8. Now Save your template..Done !

MKRdezign

Biểu mẫu liên hệ

Tên

Email *

Thông báo *

Được tạo bởi Blogger.
Javascript DisablePlease Enable Javascript To See All Widget