Demo Các hướng dẫn thủ thuât trên Blogsopt

tháng 1 2016
Add-on Wordpress Plugin Adsense Backlinks Best Blogger Template Blog And Magazine Wordpress Themes Blogger Gadgets Blogger Plugins Blogger SEO Blogger SEO Tips Blogger Templates Blogger Tricks Blogger Tutorials Blogger Widgets Blogging Blogspot Series BlueHost Business City CodeCanyon Computer Corporate Wordpress Theme Creative Creative Market Creative Wordpress Theme CSS Cuisines Destination Directory & Listings Domain eCommerce WordPress Plugin eCommerce Wordpress Theme Extensions Pack Facebook Fashion FontAwesome Foods Gallery Google Google AdSense Google Webmaster Tools Hack Host Hosting HTML Hướng dẫn JavaScript Magazine Blogger Template Make Money Online Marketing Material Design Membership Miscellaneous MultiMedia Blogger Templates Multipurpose Blogger Template Music MySQL News News Blogger Template People Phần mềm Phones Photography PHP Portfolio Premium Blogger Templates Productivity Responsive Blogger Template Rss Subscribe Widget SEO SEO Optimized Blogspot Templates SEO Tips SEO Wordpress SEO Wordpress Tips Server Social Media Share Button Social Subscription Widget Software Soliloquywp Speaker Tablets Tài liệu Tech Technology Template Blogspot TheEventsCalendar Thủ Thuật Thủ Thuật Blogger Thủ Thuật Máy Tính Tin tức Tool Travel Trends Utilities WordPress Plugin Video Wedding Widgets WooCommerce Wordpress Plugin Wordpress Seo Wordpress ThemeForest Themes Wordpress Themes Wordpress Tricks Wordpress Tutorials World News WP Plugins WP Sliders Yahoo Youtube

How To Fix Image:Missing And AMP Article Error From Blogger Template
Hello Folks,Today in this article we will explain you How to resolve Image Object Missing Error In Blogger Template.In Previous post we had already talked about fixing publisher,author,date published and date modified error.So today in this tutorial we will explain the importance of fixing image object error.

Image is a very important part of any article and website,think if google robots will not understand the image you are using in your article or website then there is no use of adding graphics and content related image.yes you can attract your readers but google won't read them.And if you add the correct image attribute to your blogspot template then google robots can understand the image and also it's important for SEO.If google robots can understand they will give priority to your content result your webpage will get higher ranking than others.

For checking the error you have to use google structure testing tool, simply go to the below URL and through click on Fetch URL to check your weblog Errors.
https://developers.google.com/structured-data/testing-tool/
Image Errors are of two types First,Image is missing and required error and second image error in AMP pages.Today we are going to fix both the errors from the webpage.To make your template error free from image object follow the steps mentioned below.

How To Solve Image:Missing and required error 

installation steps:

Step .1 Go to https://www.blogger.com and Sign in to your account
Step .2 Now From Blogger Dashboard click on ->Template ->Edit HTML
Step .3 Now Search For image_url attribute,you will find so many times find all in your template.
Step .4 Now Replace all image_url  with image.
Step .5 Now Save your template..Done !
Now you can see that all Image:Missing Error is Fixed,Let's go for second Error i.e AMP article image error.

Fix Image Object Error From AMP Article

installation steps:

Step .1 Go to https://www.blogger.com and Sign in to your account
Step .2 Now From Blogger Dashboard click on ->Template ->Edit HTML
Step .3 Now Search For the below code by using CTRL+F keys.
<article class='post hentry' itemprop='blogPost' itemscope='itemscope' itemtype='http://schema.org/BlogPosting'>
Step .4 Now copy the below schema markup code for fixing image amp article error and paste it after step .3 means after the above code.
<b:if cond='data:post.firstImageUrl'>
<div itemprop='image' itemscope='itemscope' itemtype='https://schema.org/ImageObject'>
  <meta expr:content='data:post.firstImageUrl' itemprop='url'/>
  <meta content='800 itemprop='width'/>
  <meta content='800' itemprop='height'/>
  </div>
    </b:if>

Customization: 

  • To change the image size replace 800 with your desired logo size pixels.
Step .5 Now save your template..Done !!
We hope this article helped you to learn How To Fix Image:Missing And Accelerated Mobile Pages Article Error From Blogger Template.If you liked this article please Join us on Facebook,Twitter,Google Plus.
How To Fix Publisher:Missing Required Error In Blogger Template
Hello folks,Today in this article we will explain you how to fix the publisher:missing required error in blogger template.

What is AMP ? 

The main Concern of Accelerated Mobile pages are about mobile friendly blog/websites.When you fix AMP error in your blogger template google will search for fast website and they will display them at the Top/Main page of the search engine results page.

AMP is an open source Project and the vision is that publishers can create mobile optimized content for better experience in mobile devices.You guys have seen reading on the mobile device webpage is a slow and frustrating experience,but now it doesn't have to be that way.
AMP Calculates a website's performance by so many methods,and there of them is Publishers.Publishers attribute means is that google robots can understand the who is the real publisher of the website,However Publisher doesn't means S/he is the author or admin.If you feels that you are updating your website regularly that doesn't mean you are the publisher..you might be one of them Admin or Author.In my Website case:
Currently you will see writer blunder mistake in most of the Blogger template and WordPress theme. For checking the error you have to use google structure testing tool, simply go to the below URL and through click on Fetch URL to check your weblog Errors.

https://developers.google.com/structured-data/testing-tool/
If your template has Publisher:Missing and Required Error you will see this kind of message.
publisher missing and required error in google structure data testing tool
Error indicates that search engine is not able to understand who is the publisher of your blog/website.For fixing this error follow the steps mentioned below.

Also Read:

Fixed Publisher:Author Missing Error In Blogger Template:

installation steps:

Step .1 Go to https://www.blogger.com and Sign in to your account
Step .2 Now From Blogger Dashboard click on ->Template ->Edit HTML
Step .3 Now Search For Below Code in your template
 <article class='post hentry' itemprop='blogPost' itemscope='itemscope' itemtype='http://schema.org/BlogPosting'>
Step .4 Now copy the below Schema markup code and paste it after the Step .3
<div itemprop='publisher' itemscope='' itemtype='https://schema.org/Organization'>
<div itemprop='logo' itemscope='' itemtype='https://schema.org/ImageObject' style='display:none;'>
      <img src='LOGO URL HERE'/>
      <meta content='LOGO URL HERE' itemprop='url'/>
  <meta content='600' itemprop='width'/>
  <meta content='600' itemprop='height'/>
    </div>
  <meta expr:content='data:blog.title' itemprop='name'/>
</div>

 Customization:

  • Replace LOGO URL HERE with your website logo image.
  • To change the width and height of the logo image Change 600 with your logo size.
Step .5 Now Save your template..Done !!
Now After completing all the above steps ,go back to google structure data testing tool and check your blogger template fixed from publisher:missing error from blogger template.see below for example.
fixed resolved publisher missing and required error in google structure data testing tool
We hope this article helped you to learn How To Fix Publisher:Missing Required Error In Blogger Template.If you liked this article please Join us on Facebook,Twitter,Google Plus.

Với những bạn thường xuyên tải template blogspot từ các trang chia sẻ template thì chắc hẳn đã nhiều lần thấy trang xem trước template của web họ. Trang đó hiện ra khi bạn nhấn vào nút Demo để xem template, thường thì trên cùng của trang sẽ có thanh menu chứa nút Download, Remove và bên dưới sẽ hiển thị template Demo mà bạn muốn xem. Việc tạo một trang xem trước như vậy cũng không quá khó, nếu bạn muốn, bài viết này sẽ hướng dẫn bạn làm điều đó.

Tạo trang xem trước cho link demo và download trong blogger
Đọc thêm

screen recording is very beneficial in extraordinary ways consisting of growing tutorials/motion pictures,Videos, taking screenshot of web sites, sending to bug reports to a person, etc.most of these software are free and others have premium and free trail variations. in case you realize approximately every other desirable display screen-capture utilities, please depart a comment below.

Screenpresso

Best top 13 screen capture screenshot taking software for web designers blogger and wordpress


Screenpresso is screenshot and screencast device that permits for full-display, window or place-based totally captures for your computer screenshots and HD movies.
Platform: Windows
License: Free
http://www.screenpresso.com/

Snipping Tool

Snipping Tool screenshot software for screen recording
windows operating structures has default screenshot software called "Snipping device". you could capture element or all of your computer display, upload notes, save the snip, or e-mail it right from the Snipping device window.
Platforms: Windows
License: Free
http://windows.microsoft.com/en-us/windows/use-snipping-tool-capture-screen-shots

GifCam

GifCam is easy animated gif making pictures
GifCam is easy animated gif making pictures. GifCam has a pleasant idea in which the app works like a digital camera that stays on pinnacle of all home windows so that you can flow it and resize it to record your favored location.
Platform: Windows
License: Free

LICEcap

 LICEcap can capture an area of your desktop,laptop and save it directly to image

LICEcap can capture an area of your desktop,laptop and save it directly to image .GIF or .LCF
Platform: Windows, Mac OS X
License: Open Source
http://www.cockos.com/licecap/

Grabilla

Grabilla is easy and rapid screenshot seize application
Grabilla is easy and rapid screenshot seize application. you may seize display or record the desktop movements video with voice comments and instantly upload it to their image website hosting server.
Platform: Windows, Mac OS X
License: Free Personal

JShot

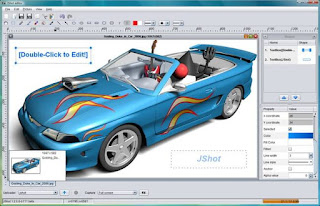
JShot capture screen and upload application software
JShot is a free screen capture and upload application.
Platforms: Windows, Mac OS X, Linux
License: Free Personal

TinyTake

TinyTake free screen capture and video recording software for blogger
TinyTake free screen capture and video recording software for bloggers.From tinytake you can direct take any size of screenshot of your laptop,desktop and directly upload and share image,video with their hosting servers.you can also upload videos to youtube.
Platform: Windows
License: Free

Lightshot

Lightshot is a free and fastest screenshot of desktop selected areas
Lightshot is a free and fastest screenshot of desktop selected areas.you can share screenshot in seconds and easy to use powerful editor.
Platform: Windows, Mac OS X
License: Free

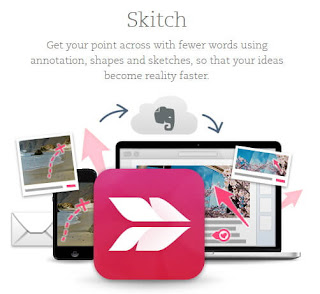
Skitch

Skitch screenshot editing software
Skitch is a top notch screenshot modifying and sharing application that lets in the person to add shapes and text to an picture, and then share it on-line.
Platform: Windows, Mac OS X, Android & iPhone
License: Freemium

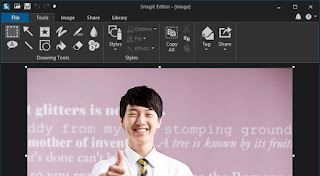
Snagit

Snagit is a tremendous screenshot capture editor

Snagit is a tremendous screenshot capture editor.Easy to use and user friendly.From Snagit you can create documentation and share it with others.
Platform: Windows, Mac OS X
License: Commercial [15 days trial avaialble]

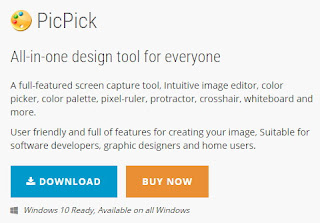
PicPick

PicPick all in one design tool for everyone
A full-featured screen capture tool, Intuitive image editor, color picker, color palette, pixel-ruler, protractor, crosshair, whiteboard and more.User friendly and full of features for creating your image, Suitable for software developers, graphic designers and home users.
Platform: Windows
License: Free Personal

FastStone Capture

FastStone Capture is a powerful, lightweight, yet full-featured screen capture tool and screen video recorder
FastStone Capture is a powerful, lightweight, yet full-featured screen capture tool and screen video recorder. It allows you to easily capture and annotate anything on the screen including windows, objects, menus, full screen, rectangular / freehand / fixed regions as well as scrolling windows / web pages. It also allows you to record all screen activities including onscreen changes, speech from microphone, mouse movements and clicks into highly compressed video files.
Platform: Windows
License: Commercial [30 days trial avaialble]

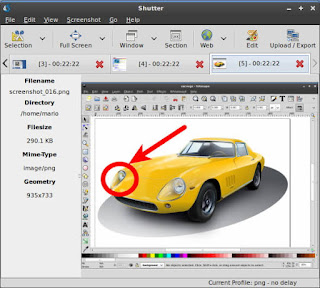
Shutter

Shutter is a feature-rich screenshot program for Linux based operating systems
Shutter is a feature-rich screenshot program for Linux based operating systems such as Ubuntu. You can take a screenshot of a specific area, window, your whole screen, or even of a website – apply different effects to it, draw on it to highlight points, and then upload to an image hosting site, all within one window. Shutter is free, open-source, and licensed under GPL v3.
Platform: Linux
License: Open Source

Greenshot

Greenshot is a light-weight screenshot software tool for Windows
Greenshot is a light-weight screenshot software tool for Windows.Quickly create screenshots of a selected region, window or fullscreen; you can even capture complete (scrolling) web pages from Internet Explorer.
Easily annotate, highlight or obfuscate parts of the screenshot and Export the screenshot in various ways: save to file, send to printer, copy to clipboard, attach to e-mail, send Office programs or upload to photo sites like Flickr or Picasa, and others.
Platform: Windows
License: Open Source

Add Responsive Feed Burner Email Subscription Box In Blogger
Hello folks,today in this article we are going to explain how to add responsive feed burner widget in blogger post footer.This widget is absolutely responsive which suits with any template.natural CSS script used in this widget so, it hundreds time faster.you can customize it without any problems for the usage of this in any colored template.you can region this widget underneath blog header, above footer.To grab this widget follow the steps mentioned below.

How To Add Email Subscription Responsive Feed Burner Gadget In Blogger Template

installation steps:

Step 1. Log in to your Blogger account and Go to your Blogger Dashboard.
Step 2. Now Click on -> Template -> Edit HTML.
Step 3. Now Search for ]]></b:skin> by Pressing Ctrl+F keys.
Step 4. Copy the below code and paste it just before the ]]></b:skin> tag.
/* Feed Burner Subscribtion Widget Box by http://www.bloggersstand.com */
#feedsignup{position:relative;padding:5px 0;background:#2D363E;overflow:hidden;border-top:4px solid #eee;}
.subscribe-wrapper{color:#fff;font-size:16px;line-height:normal;margin:0;text-align:center;text-transform:none;font-weight:400;float:right;width:50%}
.subscribe-form{clear:both;display:block;overflow:hidden}
form.subscribe-form{clear:both;display:block;margin:0;width:auto;overflow:hidden}
.feedsignup-email-field{background:#252C33;color:#ccc;margin:10px 0;padding:15px 20px;width:50%;border:0}
.feedsignup-email-button{background:#5CB85C;color:#fff;cursor:pointer;font-weight:700;padding:11px 30px;margin-left:15px;text-transform:none;font-size:16px;border:0;transition:all .6s}
.feedsignup-email-button:hover{background:#017CB9;}
#feedsignup p.feedtext{margin:16px;text-align:center;color:rgba(255,255,255,.6);font-size:200%;float:left;font-weight:400;line-height:normal;width:45%}
#feedsignup p.feedtext span {position:relative;overflow:hidden;font-weight:700;transition:all .5s}
#feedsignup p.feedtext span.feedtext1 {font-weight:400;font-style:italic;color:rgba(255,255,255,.6);text-transform:lowercase}
#feedsignup p.feedtext span.feedtext1:before,#feedsignup p.feedtext span.feedtext1:after{display:none}
#feedsignup p.feedtext span:before{content:'';position:absolute;bottom:-2px;left:0;width:0;height:3px;margin:10px 0 0;background:rgba(255,255,255,.1);transition:all .5s}
#feedsignup:hover p.feedtext span:before{width:100%;}
@media only screen and (max-width:767px){
  #feedsignup p.feedtext{margin:0 0 20px 0;width:100%;}
   .subscribe-wrapper {width:100%;}
}

Customization: 

  • To change the widget font text size ,replace 200% with your desired value.
  • To change the color of Sign Up Button Replace,5CB85C with your desired color.you can choose colors from here:Color wheel picker or Color Code Generator
  • To change the sign up button hover color,replace 017CB9

Step 5. Now Search <data:post.body/> or <div class='post-footer'> by using CTRL+F keys.
Step 6. Now To add the widget below Blog header  add the below code just above <div id='content-wrapper'>
Step 7. To place the widget in the blog post footer.Paste the below code after<data:post.body/> 
Step 8.To display the widget in the blog footer section.paste the below code above <footer id='footer-wrapper'> 
<b:if cond='data:blog.pageType != &quot;error_page&quot;'>    
<b:if cond='data:blog.pageType != &quot;static_page&quot;'>
<b:if cond='data:blog.pageType != &quot;item&quot;'>
<div id='feedsignup'>
<p class='feedtext'><span>JOIN OUR SITE</span>
<span class='feedtext1'>TO LEARN</span> PRO TRICKS</p>
<div class='subscribe-wrapper'>
<div class='subscribe-form'>
    <form action='http://feedburner.google.com/fb/a/mailverify?uri=Bloggersstand' class='subscribe-form' method='post' onsubmit='window.open (&apos;http://feedburner.google.com/fb/a/mailverify?uri=Bloggersstand&apos;, &apos;popupwindow&apos;, &apos;scrollbars=yes,width=550,height=520&apos;);return true' target='popupwindow'>
<input name='uri' type='hidden' value='Bloggersstand'/><input name='loc' type='hidden' value='en_US'/><input autocomplete='off' class='feedsignup-email-field' name='email' placeholder='Enter your Email Here...'/><input class='feedsignup-email-button' title='SIGN UP' type='submit' value='SIGN UP!'/></form>
  </div>
</div>
</div>
            </b:if>    
      </b:if></b:if>
Change Bloggersstand with your feed burner id.
Step 9. Now Save your template..Done !

We hope this article helped you to learn How to Add Responsive Feed Burner Email Subscription Box In Blogger Template.If you liked this article please Join us on Facebook,Twitter,Google Plus.

Add CSS3 Notification Message Box In Blogger Template
Hello folks,Today in this article we are going to explain you how to add CSS notification Message boxes.By adding separate shade and textual content we can make it more beautiful for our weblog readers. And they may love to read your content material with complete energy. because of this i'm going to share sets of notification message boxes to boost your content.To grab this trick just follow the mentioned steps below.

How To Add Custom Notification Message Box Using CSS3

installation steps:

Step 1. Log in to your Blogger account and Go to your Blogger Dashboard.
Step 2. Now Click on -> Template -> Edit HTML.
Step 3. Now Search for ]]></b:skin> by Pressing Ctrl+F keys.
Step 4.Copy the below code and paste it just before the ]]></b:skin> tag.
/* Notification Message Box by http://www.bloggersstand.com */
.bsdmesg{color:#FFF;margin-bottom:15px;box-shadow:0 1px 2px rgba(0,0,0,0.20);border-radius:2px;padding:10px}
.success{background-color:#5CB85C}
.alert{background-color:#5BC0DE}
.warning{background-color:#F0AD4E}
.update{background-color:#017CB9}
.info{background-color:#18A8AA}
.error{background-color:#525252}
.headline{font-size:16px;background-color:rgba(0,0,0,0.30);padding:8px 10px;margin:-10px;margin-bottom:10px}
.headline > .fa{margin-$endSide:5px}
Step 5. Now Search for <head> by Pressing Ctrl+F keys.
Step 6.Copy the below script and paste it just before the <head> tag.
<link href='//netdna.bootstrapcdn.com/font-awesome/4.5.0/css/font-awesome.min.css' rel='stylesheet'/>
Step 7. Now Save your template.

Adding Notification Message Boxes In Post Editor 

Step 1. Log in to your Blogger account and Go to your Blogger Dashboard.
Step 2. Now Write New post and click on edit html Button from post editor
Step 3. Now Copy Anyone code from the below and paste inside the post editor.
For Success Box:
Css Notifications Success Box
<div class="success">
<div class="bsdmesg">
<div class="headline">
<i class="fa fa-check-circle"></i>Success message</div>
Dummy Text for Success Box. </div>
</div>
 For Update Box:
Css Notifications update Box
<div class="update">
<div class="bsdmesg">
<div class="headline">
<i class="fa fa-volume-up"></i>Update message</div>
Dummy Text for Update Box.</div>
</div>
For Alert Box:
Css Notification alert Box
<div class="alert">
<div class="bsdmesg">
<div class="headline">
<i class="fa fa-exclamation"></i>Alert message</div>
Dummy Text for Alert Box. </div>
</div>
 For Warning Box:
Css Notification warning Box
<div class="warning">
<div class="bsdmesg">
<div class="headline">
<i class="fa fa-exclamation-triangle"></i>Warning message</div>
Dummy Text for Warning Box. </div>
</div>
 For Info Box:
Css Notification info Box

<div class="info">
<div class="bsdmesg">
<div class="headline">
<i class="fa fa-info-circle"></i>Info message</div>
Dummy Text for Info Box. </div>
</div>
 For Error Box:
Css Notification error Box
<div class="error">
<div class="bsdmesg">
<div class="headline">
<i class="fa fa-exclamation-circle"></i>Error message</div>
Dummy Text for Error Box. </div>
</div>
We hope this article helped you to learn How to Add Add CSS3 Notification Message Box In Blogger Template.If you liked this article please Join us on Facebook,Twitter,Google Plus.

Adding a Clever Social Media Sharing Widget in Blogger Post Footer
Hello Folks,Today in this article we are going to explain you How to add Smart Social Media Sharing Widget In Blogger Post Footer.There may be no question that social sharing widget can accelerate content promotion around the internet. at the same time readers like your article or tutorial then they have a tendency to be share on their social media profile. As a result it enables to unfold your content URL firmly.Many Blogger do that mistake that they don't add social sharing widget on their web page Or sometimes they add social sharing widget in incorrect location.In this widget we are using pure java script and also a use of font awesome icons.we have added 12 social media sharing buttons but from them top 3 will display on the page i.e Google +,Twitter and Facebook and rest our in share more button.To grab this social profile sharing buttons follow the steps mentioned below.

How To Add Clever Social Media Share Buttons In Blogger Post Footer

installation steps:

Step 1. Log in to your Blogger account and Go to your Blogger Dashboard.
Step 2. Now Click on -> Template -> Edit HTML.
Step 3. Now Search for <head> by Pressing Ctrl+F keys.
Step 4.Copy the below code and paste it just below the <head> tag.
<link href='//netdna.bootstrapcdn.com/font-awesome/4.5.0/css/font-awesome.min.css' rel='stylesheet'/>
Step 5. Now Search for ]]></b:skin> by Pressing Ctrl+F keys.
Step 6.Copy the below code and paste it just before the ]]></b:skin> tag.
/* Clever Social Share widget by http://www.bloggersstand.com */
.smartshare,.sharewrap{position:relative;display:block;font-size:0;margin:auto;text-align:center}
.sharewrap{display:block;text-align:center;margin:30px 0 0 0}
.sharewrap a.sb,.sharewrap a.fb,.sharewrap a.gp,.sharewrap a.tw,.sharewrap span.pl{text-decoration:none!important;display:inline-block;margin:0 .5px;font-weight:400;font-size:12px;color:#fff;text-shadow:none;padding:6px 10px;opacity:1;transition:all .3s}
.sharewrap a.sb {background:#222222;}
.sharewrap a.gp {background:#f20000;}
.sharewrap a.fb {background:#516ca4;}
.sharewrap a.tw {background:#00baff;}
.sharewrap span.pl {background:#ff6600;}
.fbbutback,.googlebutback,.plusbutback,.twbutback{font-size:13px!important;vertical-align:middle}
.sharewrap a.fb:hover,.sharewrap a.gp:hover,.sharewrap a.tw:hover,.sharewrap span.pl:hover{color:#fff;opacity:.9}
.sharewrap a.fb:active,.sharewrap a.gp:active,.sharewrap a.tw:active,.sharewrap span.pl:active{box-shadow:inset 0 1px 0 rgba(0,0,0,.16)}
span.pl{color:green;cursor:pointer}
#sharepop{display:none}
.sharepopup{position:absolute;bottom:100%;right:15%;z-index:99;float:left;min-width:100px;padding:5px 10px;margin:0;font-size:13px;text-align:left;list-style:none;background-color:#fff;-webkit-background-clip:padding-box;background-clip:padding-box;border:1px solid #ddd;border-radius:3px;}
.sharepopup li{list-style:none!important;margin:0!important;padding-left:0!important;line-height:1.8em!important}
.sharepopup li a{color:#333!important;font-weight:400;display:block}
.sharepopup li a:hover{color:#078FF8!important}
ul#sharepop{margin:10px 0;padding:5px 15px}
Step 7. Now Search for <data:post.body/> by Pressing Ctrl+F keys and if you are not able to find this code search for <div class='post-footer'>
Step 8.Copy the below code and paste it just after the <data:post.body/> tag.
Step 9. Now if you want to show sharing buttons below the post title then paste the below code just above <data:post.body/> tag.(*Step 9 only for sharing buttons below post titles)
<b:if cond='data:blog.pageType != &quot;index&quot;'>
<b:if cond='data:blog.pageType != &quot;archive&quot;'>
      <b:if cond='data:blog.pageType == &quot;item&quot;'>
<script type='text/javascript'>
//<![CDATA[
var siteurl = window.location.href;
  document.write('<div class="sharewrap"><div class="smartshare"> \
<a class="sb" <h2>Sharing is Caring </h2><i class="fa fa-share-square-o"></i></a> \ \
<a class="gp social-popup" href="https://plus.google.com/share?url=' + siteurl + '" target="_blank" title="Share to Google+">\
    <i class="fa fa-google-plus googlebutback"></i> Google</a> \
<a class="fb social-popup" href="https://www.facebook.com/sharer/sharer.php?u=' + siteurl + '" target="_blank" title="Share to Facebook">\
    <i class="fa fa-facebook fbbutback"></i> Facebook</a> \
<a class="tw social-popup" href="https://twitter.com/intent/tweet?text='+encodeURIComponent(document.title)+'&url='+siteurl+'" target="_blank" title="Share to Twitter">\
    <i class="fa fa-twitter twbutback"></i> Twitter</a> \
    <span class="pl" data-target="#sharepop"><i class="fa fa-share-alt plusbutback"></i> Share More</span> \
<ul class="sharepopup" id="sharepop"> \
    <li><a class="social-popup" href="javascript:pinIt();">Pinterest</a></li> \
    <li><a class="social-popup" href="//www.digg.com/submit?url=' + siteurl + '" target="_blank" title="Share This On Digg">Digg</a></li> \
    <li><a class="social-popup" href="//www.linkedin.com/shareArticle?mini=true&amp;url=' + siteurl + '" target="_blank" title="Share This On Linkedin">Linkedin</a></li> \
    <li><a class="social-popup" href="//www.stumbleupon.com/submit?url=' + siteurl + '&amp;title='+encodeURIComponent(document.title)+'" target="_blank" title="Share This On Stumbleupon">Stumbleupon</a></li> \
    <li><a class="social-popup" href="//delicious.com/post?url=' + siteurl + '&amp;title='+encodeURIComponent(document.title)+'" target="_blank" title="Share This On Delicious">Delicious</a></li> \
    <li><a class="social-popup" href="http://www.tumblr.com/share/link?url=' + siteurl + '&name='+encodeURIComponent(document.title)+'&description='+encodeURIComponent(document.title)+'" target="_blank" title="Share This On Tumblr">Tumblr</a></li> \
    <li><a class="social-popup" href="http://bufferapp.com/add?text='+encodeURIComponent(document.title)+'&url=' + siteurl + '" target="_blank" title="Share This On BufferApp">BufferApp</a></li> \
    <li><a class="social-popup" href="https://getpocket.com/save?url=' + siteurl + '&title='+encodeURIComponent(document.title)+'" target="_blank" title="Share This On Pocket">Pocket</a></li> \
    <li><a class="social-popup" href="http://www.evernote.com/clip.action?url=' + siteurl + '&title='+encodeURIComponent(document.title)+'" target="_blank" title="Share This On Evernote">Evernote</a></li> \
    </ul> \
</div><div class="clear"></div></div> \
');
$(document).ready(function(){$(".pl").click(function(){$("#sharepop").slideToggle("fast")})});
function pinIt(){var t=document.createElement("script");t.setAttribute("type","text/javascript"),t.setAttribute("charset","UTF-8"),t.setAttribute("src","https://assets.pinterest.com/js/pinmarklet.js?r="+99999999*Math.random()),document.body.appendChild(t)};
//]]>
</script>
<div class='clear'/>
            </b:if>    
      </b:if></b:if>
Step 10. Now Save your Template..Done !

We hope this article helped you to learn How to Add Clever Social Media Sharing Widget In Blogger Post Footer.If you liked this article please Join us on Facebook,Twitter,Google Plus.

BlueHost Republic Day Hosting Offer For India
BlueHost is a well known hosting company in the world owned by Endurance International Group having #1 rank and value, its is recommended hosting network by WordPress.org. It is a reliable hosting service and served millions of website since 1996 and all the customers are agreed with its great and smoothly service. We have mentioned its few great features you will surely like, if you want to work by using this network's service then kindly click the below button to signup.
Promo code: REPUBLICDAY2016
Offer: 40% off on Hosting + Free domain + Privacy Protect (valid on 1st year)
Start Date: 25th January, 2016
End Date: 27th January, 2016
Note:Click on above Flat 40% off On Hosting+Free Domain and Use our Promo Code.If you will not click on above link to buy you will net get discount.

adding css image effect convert image into grey color on hover
Hello Folks,Today in this article we are going to explain How to Add Css Image Hover Effect In Blogger Template.Whenever a mouse is placed over a certain image or hyperlink in webpage that action is called a effect on hover.In this article we are applying pure CSS t oconvert images into Greyscale effect(when you place a mouse on image the colorful image will convert into beautiful grey scale image) and second one Bump up effect (means when you place a mouse on a image it will bounce up means it will bounce up in upward direction).By adding a nice hover animation effect on your images will really attract to your visitors.To grab this trick follow the steps mentioned below.

create css hover effect in blogger images

installation steps:

Step 1. Log in to your Blogger account and Go to your Blogger Dashboard.
Step 2. Now Click on -> Template -> Edit HTML.
Step 3. Now Search for ]]></b:skin> by Pressing Ctrl+F keys.
Step 4.Copy the below code and paste it just before the ]]></b:skin> tag.


For Bump Up Effect:
.post-body img {
    border: 5px solid #ccc;
    float: left;
    margin: 15px;
    -webkit-transition: margin 0.5s ease-out;
    -moz-transition: margin 0.5s ease-out;
    -o-transition: margin 0.5s ease-out;
}
.post-body img:hover {
    margin-top: 2px;
}
For GreyScale Effect :
.post-body img {
    filter: url("data:image/svg+xml;utf8,<svg xmlns=\'http://www.w3.org/2000/svg\'><filter id=\'grayscale\'><feColorMatrix type=\'matrix\' values=\'0.3333 0.3333 0.3333 0 0 0.3333 0.3333 0.3333 0 0 0.3333 0.3333 0.3333 0 0 0 0 0 1 0\'/></filter></svg>#grayscale");
 /* Firefox 3.5+ */
    filter: gray;
 /* IE6-9 */
    -webkit-filter: grayscale(100%);
 /* Chrome 19+ & Safari 6+ */;
}
.post-body img:hover {
    filter: none;
    -webkit-filter: grayscale(0%);
}
 Step 5. Now Save your template..Done !

We hope this article helped you to learn How to Add a  CSS Hover Effect In Blogger Images Trick.If you liked this article please Join us on Facebook,Twitter,Google Plus.

If you teach a class or help your own child with homework, you may wonder how you’ll ever get through the subject of history. Many kids are uninterested in what they consider outdated stories even if they are true. However, you can bring history to life by creating family trees. Here are a few suggestions for using this resource to enhance learning and memorization.

As a Visual Aid

You can utilize family trees when you’re learning about specific families from history, such as ancient kings and queens. It’s hard for kids to keep track of names and who is related to whom. A family tree provides a visual aid to help kids remember these people and how they relate to others.
A prime example is John Adams and his son, John Quincy Adams or Theodore and Franklin Roosevelt. For world history, remember all of the kings who carried on the family name, such as Henry the Viii or Charles the III. 
Enlarge a basic family tree template and put it on poster paper that you can hang on the wall. Insert names and simple facts to help kids remember the lessons. You can also give them smaller family trees for them to fill out as they learn the information. 

As a Class Project

To make history more than just a bunch of facts and figures, create a class project where everyone researches family members of a famous historical family. They can learn important facts while also discovering personal information about these people. 
You can also take a simple three- or four-generation family tree template, fill it out with the names of the people and have the class research other information. For example, the kids could make a list of all the wars during the family’s lifetime or what inventions were discovered.

Relate History to Their Lives

Another use for family trees is to have kids fill out information about their own families. You can have them go back to the time period you’re studying about. It will bring these events to life when they realize that their ancestors were alive during this time. Help them imagine what great-grandma would have thought about World War II or the 1950’s. 
Instead of just reading about people they don’t know, they will learn about history that was current when their own family members were alive. If possible, you can even have them find out what role they played in the events. For example, some kids may have great-grandfathers who fought in World War II. This information will become more than just a bunch of statistics, but part of their own family history.

When studying history, you can help kids learn how to relate to events that happened long before they were born with the aid of family trees. In the process, they may just find they learn something about themselves and their family. At the very least, history will come to life for them and they will find it interesting and relevant.

Written By Guest Writer : Suzie Kolber

Suzie Kolber created http://obituarieshelp.org/free_printable_blank_family_tree.html to be the complete online resource for “do it yourself” genealogy projects. The site offers the largest offering of family tree chart online. The site is a not for profit website dedicated to offering free resources for those that are trying to trace their family history.


Bạn cảm thấy Facebook lấy đi của bạn quá nhiều thời gian, làm ảnh hưởng nhiều tới cuộc sống thường ngày. Bạn đang dần trở thành một con nghiện Facebook và muốn cai nghiện nó. Tài khoản Facebook của bạn bị hack, bị đánh cắp thông tin cá nhân. Những lúc như vậy, bạn muốn khóa tài khoản Facebook của mình lại hoặc mạnh tay hơn là xóa luôn tài khoản. Tuyệt vời, bài viết này là dành cho bạn, với vài bước đơn giản, bạn có thể thổi bay mọi vết tích của tài khoản Facebook.

1. Hướng dẫn khóa tài khoản Facebook tạm thời

Bước 1: Đăng nhập vào tài khoản Facebook của bạn
Đọc thêm

How To Create Drop Caps-First letter large In Blogger Post
How To Create/Make Drop Caps In Blogger Template | Hello Guys,today in this article we will show you how make first letter large in blogger post that is called Drop Caps.You have seen a use of Drop Caps in Newspaper,Magazines and also lot of websites are using this technique to make paragraph beautiful by making first letter large. You can use this technique in first paragraph of your article to look more stylish and unique.To grab this trick follow the steps mentioned below.we are using pure CSS for Drop Caps.

How Make Drop Caps In Blogger Post Template

installation steps:

Step 1. Log in to your Blogger account and Go to your Blogger Dashboard.
Step 2. Now Click on -> Template -> Edit HTML.
Step 3. Now Search for ]]></b:skin> by Pressing Ctrl+F keys.
Step 4.Copy the below code and paste it just before the ]]></b:skin> tag.
.post-outer:first-letter {
    float: left;
    font-size: 4em;
    color: #666666;
    margin-right: 0.10em;
    line-height: 90%;
    text-shadow: 0.05em 0.05em #C0C0C0;
}
Step 5.Save your template..You Are Done !!

Customization:

  • To change the color of the letter (Drop Caps) replace 666666 with your color hex value.you can choose colors from our tool Color Wheel Picker and Color Code Generator.
  • To change the shadow color of the Drop Caps, replace C0C0C0. with your color hex value.
We hope this article helped you to learn How to Make First letter large in paragraph by using CSS trick.If you liked this article please Join us on Facebook,Twitter,Google Plus.

Hội nhóm Facebook là nơi mà mọi người có thể giao lưu kết bạn, tâm sự, bàn luận và chia sẻ kiến thức cho nhau. Thường một nhóm trên Facebook sẽ gồm những thành viên cùng chung sở thích, hội bạn thân hay một lớp học. Việc tạo nhóm trên Facebook cũng rất đơn giản, bạn có thể dễ dàng có cho mình một nhóm và trở thành quản trị viên của nhóm đó với vài bước sau đây.

Bước 1: Tại giao diện Facebook, nhấn vào hình mũi tên rồi chọn Tạo nhóm

Đọc thêm

Trong thế giới mạng xã hội Facebook thì Fanpage như là một cộng đồng thu nhỏ vậy. Fanpage có rất nhiều loại hình khác nhau, nó là nơi giải trí, cập nhật tin tức của ca sĩ, nghệ sĩ hay là nơi các doanh nghiệp tiếp cận khách hàng, giới thiệu sản phẩm. Nói chung, Fanpage có rất nhiều lợi ích, ai cũng có thể tạo Fanpage và trở thành Admin. Việc tạo một Fanpage cũng rất đơn giản, các bạn chỉ cần thực hiện theo những bước sau.

Hướng dẫn tạo fanpage trên facebook
Đọc thêm

How to Disable Copy Text Selection Using CSS In Blogger Template
Hello Guys,Today in this article we will explain you How to disable copy text selection using CSS in your blogger template.Just add this CSS into your Blogger website to prevent/Restrict users selecting/Copy text of your website or blog.We are using pure CSS for this trick you don't have to add lot of codes.To add this trick in your blogspot template follow the steps mentioned below.

How to Disable Copy or Select Text In Blogger Template By Using CSS:

installation steps:

Step 1. Log in to your Blogger account and Go to your Blogger Dashboard.
Step 2. Now Click on -> Template -> Edit HTML.
Step 3. Now Search for ]]></b:skin> by Pressing Ctrl+F keys. 
Step 4.Copy the below code and paste it just before the ]]></b:skin> tag.
 body {
    -webkit-touch-callout: none;
    -webkit-user-select: none;
    -khtml-user-select: none;
    -moz-user-select: none;
    -ms-user-select: none;
    user-select: none;
}
Step 5. Now Save your template..you are Done !!

We hope this article helped you to learn How to Disable Copy Text Selection In Blogspot Theme By Using CSS.If you liked this article please Join us on Facebook,Twitter,Google Plus.
How to Disable Right Click In Blogger Using Jquery Trick
How to Disable Right Click In Blogger Using Jquery Trick | Hello Folks,Today in This article we will explain to you how to disable right click function using a jQuery code snippet.So you must disable right click for protecting your page source and also the content.To add this feature in your Blogger website or blog follow the steps mentioned below.

How to Disable Right Click On Website By Using Jquery:

installation steps:

Step 1. Log in to your Blogger account and Go to your Blogger Dashboard.
Step 2. Now Click on -> Template -> Edit HTML.
Step 3. Now Search for </head> tag by Pressing Ctrl+F keys. 
Step 4.Copy the below code and paste it just before the </head> tag.
<script src='https://ajax.googleapis.com/ajax/libs/jquery/1.11.3/jquery.min.js' type='text/javascript'></script>
<script src='http://code.jquery.com/jquery-migrate-1.2.1.js'></script>
<script type='text/javascript'>
//<![CDATA[
jQuery(document).ready(function($) {
    $(document).bind("contextmenu", function(e) {
        return false;
    });
});
//]]>
</script>
Note:If Jquery is already installed in your blogger template then remove the following below lines from the above code.
 <script src='https://ajax.googleapis.com/ajax/libs/jquery/1.11.3/jquery.min.js' type='text/javascript'></script>
<script src='http://code.jquery.com/jquery-migrate-1.2.1.js'></script>
Step 5. Now Save your template..you are Done !!

We hope this article helped you to learn How to Disable Right Click In Blogger Using Jquery Trick For Content Protection.If you liked this article please Join us on Facebook,Twitter,Google Plus.
Đã bao giờ bạn cảm thấy khó chịu với những lời mời chơi game, ứng dụng trên Facebook chưa? Riêng mình thì hầu như không chơi game trên Facebook nên thường không thích khi lúc nào cũng có những lời mời chơi game xuất hiện trên thông báo, và mình tin cũng có nhiều bạn lâm vào cảnh ngộ như mình. Vậy nên bài viết này, mình sẽ hướng dẫn các bạn chặn lời mời chơi game, ứng dụng phiền toái từ bạn bè.

Chặn lời mời ứng dụng facebook
Đọc thêm

Tag là một tính năng rất hay của facebook, nhưng trong nhiều trường hợp nó lại bị lợi dụng để quảng cáo sản phẩm, bán sim hay lừa đảo khuyến mãi, điều đó gây ức chế cho không ít người. Thực tế thì tính năng này không thể tắt được, trừ khi bạn unfriend với người bạn muốn chặn tag facebook. Tuy nhiên facebook có hỗ trợ người dùng bằng tính năng xem lại các thẻ được tag trước khi nó được xuất hiện trên tường của bạn. Bài viết này sẽ hướng dẫn chặn tag trên tường facebook của bạn, bắt tay vào làm nhé.

Tại giao diện Facebook, bạn nhấn vào hình mũi tên và chọn Cài đặt

Đọc thêm

Mỗi tài khoản Facebook cho phép có tối đa 5000 bạn bè, làm sao để sử dụng số kết bạn này cho thỏa đáng thì còn tùy vào mỗi người. Có những người kết bạn tùy ý, gặp ai cũng có thể kết bạn, nhưng với một số người khác chỉ muốn kết bạn với gia đình, người thân, bạn bè mà không muốn kết bạn với người lạ và tất nhiên họ sẽ thấy khó chịu nếu ngày nào cũng phải nhận lời mời kết bạn từ những người không quen biết. Bài viết này sẽ giúp các bạn đó chặn kết bạn với những người xa lạ và chỉ cho phép bạn bè, người thân mới có quyền kết bạn với mình.

Hướng dẫn chặn kết bạn trên Facebook

Tại giao diện Facebook, bạn nhấn vào hình mũi tên và chọn Cài đặt

Đọc thêm

Facebook là một mạng xã hội số 1 ở Việt Nam nói riêng và trên thế giới nói chung. Điển hình dễ nhận thấy nhất là hiện nay người người Facebook, nhà nhà Facebook, ăn Facebook, ngủ Facebook, chỉ cần với chiếc điện thoại hoặc máy tính có kết nối internet là bạn có thể truy cập vào Facebook. Với Facebook, bạn có thể dễ dàng kết nối, tán gẫu và chia sẻ với bạn bè, người thân cho dù họ ở bất kỳ nơi đâu trên thế giới. Việc tạo một tài khoản Facebook cũng rất đơn giản và hoàn toàn miễn phí !

Chuẩn bị

Một tài khoản Email (có thể là Gmail, Yahoo,...) hoặc một số điện thoại (chỉ để phòng trường hợp khi Facebook yêu cầu xác nhận đăng ký qua điện thoại thôi)

Hướng dẫn tạo tài khoản Facebook

Bước 1: Truy cập https://www.facebook.com

Đọc thêm

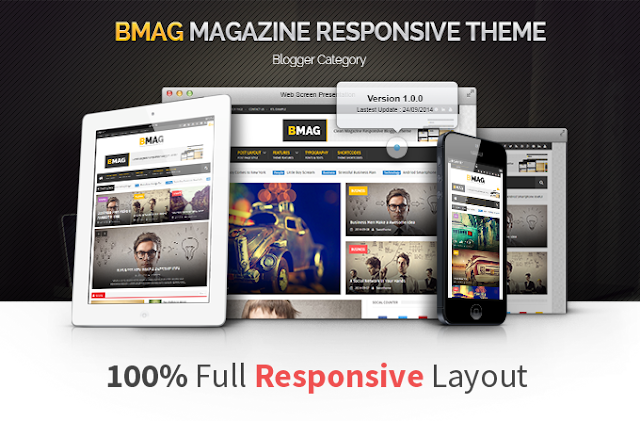
Free Download BMAG V2.0.3 - Magazine Responsive Blogger Template
Free Download BMAG V2.0.3 - Magazine Responsive Blogger Template | BMAG is a Magazine Responsive Blogger Template, it is clean and compatible with many devices, It’s perfect for creating your magazine or blog using blogspot, no need to coding as it is very customizable.

Full List of Theme Features:

  • Current version 2.0.3
  • Fully Responsive Design
  • PowerFull Admin Panel Check it
  • Theme Option : Translator / Boxed Style Switcher / Image Scroll Animation New
  • Unlimited Colors & Fonts
  • Fully customizable Design
  • Search Engine Optimized (SEO)
  • Post Layout Style : Full Width / Sidebar Right / Sidebar Left with shortcodes New
  • 9 Home Layout Boxs Style with shortcodes New
  • Main Intro Posts with two options (recent or random)
  • Cool news ticker widget with two options (recent or label name)
  • Support Facebook Open Graph & Twitter Cards New
  • Adsense Ready with new widget to add ads inside posts
  • jQuery and CSS3 Effects
  • Social Counter widget
  • Easy customizable jQuery Dropdown Menu
  • Cross Browser Compatible
  • Preview posts ready
  • Font Awesome Icons Integration
  • Support RTL Languages
  • LTR / RTL Switcher From OneClick New
  • Related posts under posts
  • Full Images Quality
  • Suppor youtube thumbs
  • Random Posts / Recent Posts / Recent Comments widgets with shortcodes
  • Popup contact US Form
  • Tabs Widgets
  • Custom Widgets
  • Threaded Blogger Comments
  • Error 404 Page
  • Posts shortcodes
  • Easy to create Contact us page
  • faceook like box with shortcode
  • All theme widgets and options are easy to customize no need to use codes
  • Blogger, Disqus and Facebook comments in tabs using shortcode options
  • Enable disqus comments with disqus shortname only
  • Set pagination posts number from theme option panel
  • Show/hide home pagination for recent posts from theme options panel
To Download BMAG V2.0.3 Just Drop The Email Id Below In Comment Box,Due to Security reasons we will direct send in your Inbox.Or You Can Directly Contact Us From Here.Team:BloggersStand.Com

MKRdezign

Biểu mẫu liên hệ

Tên

Email *

Thông báo *

Được tạo bởi Blogger.
Javascript DisablePlease Enable Javascript To See All Widget